> ## Documentation Index
> Fetch the complete documentation index at: https://docs.hurrypayments.com/llms.txt
> Use this file to discover all available pages before exploring further.
# Conectar Whop
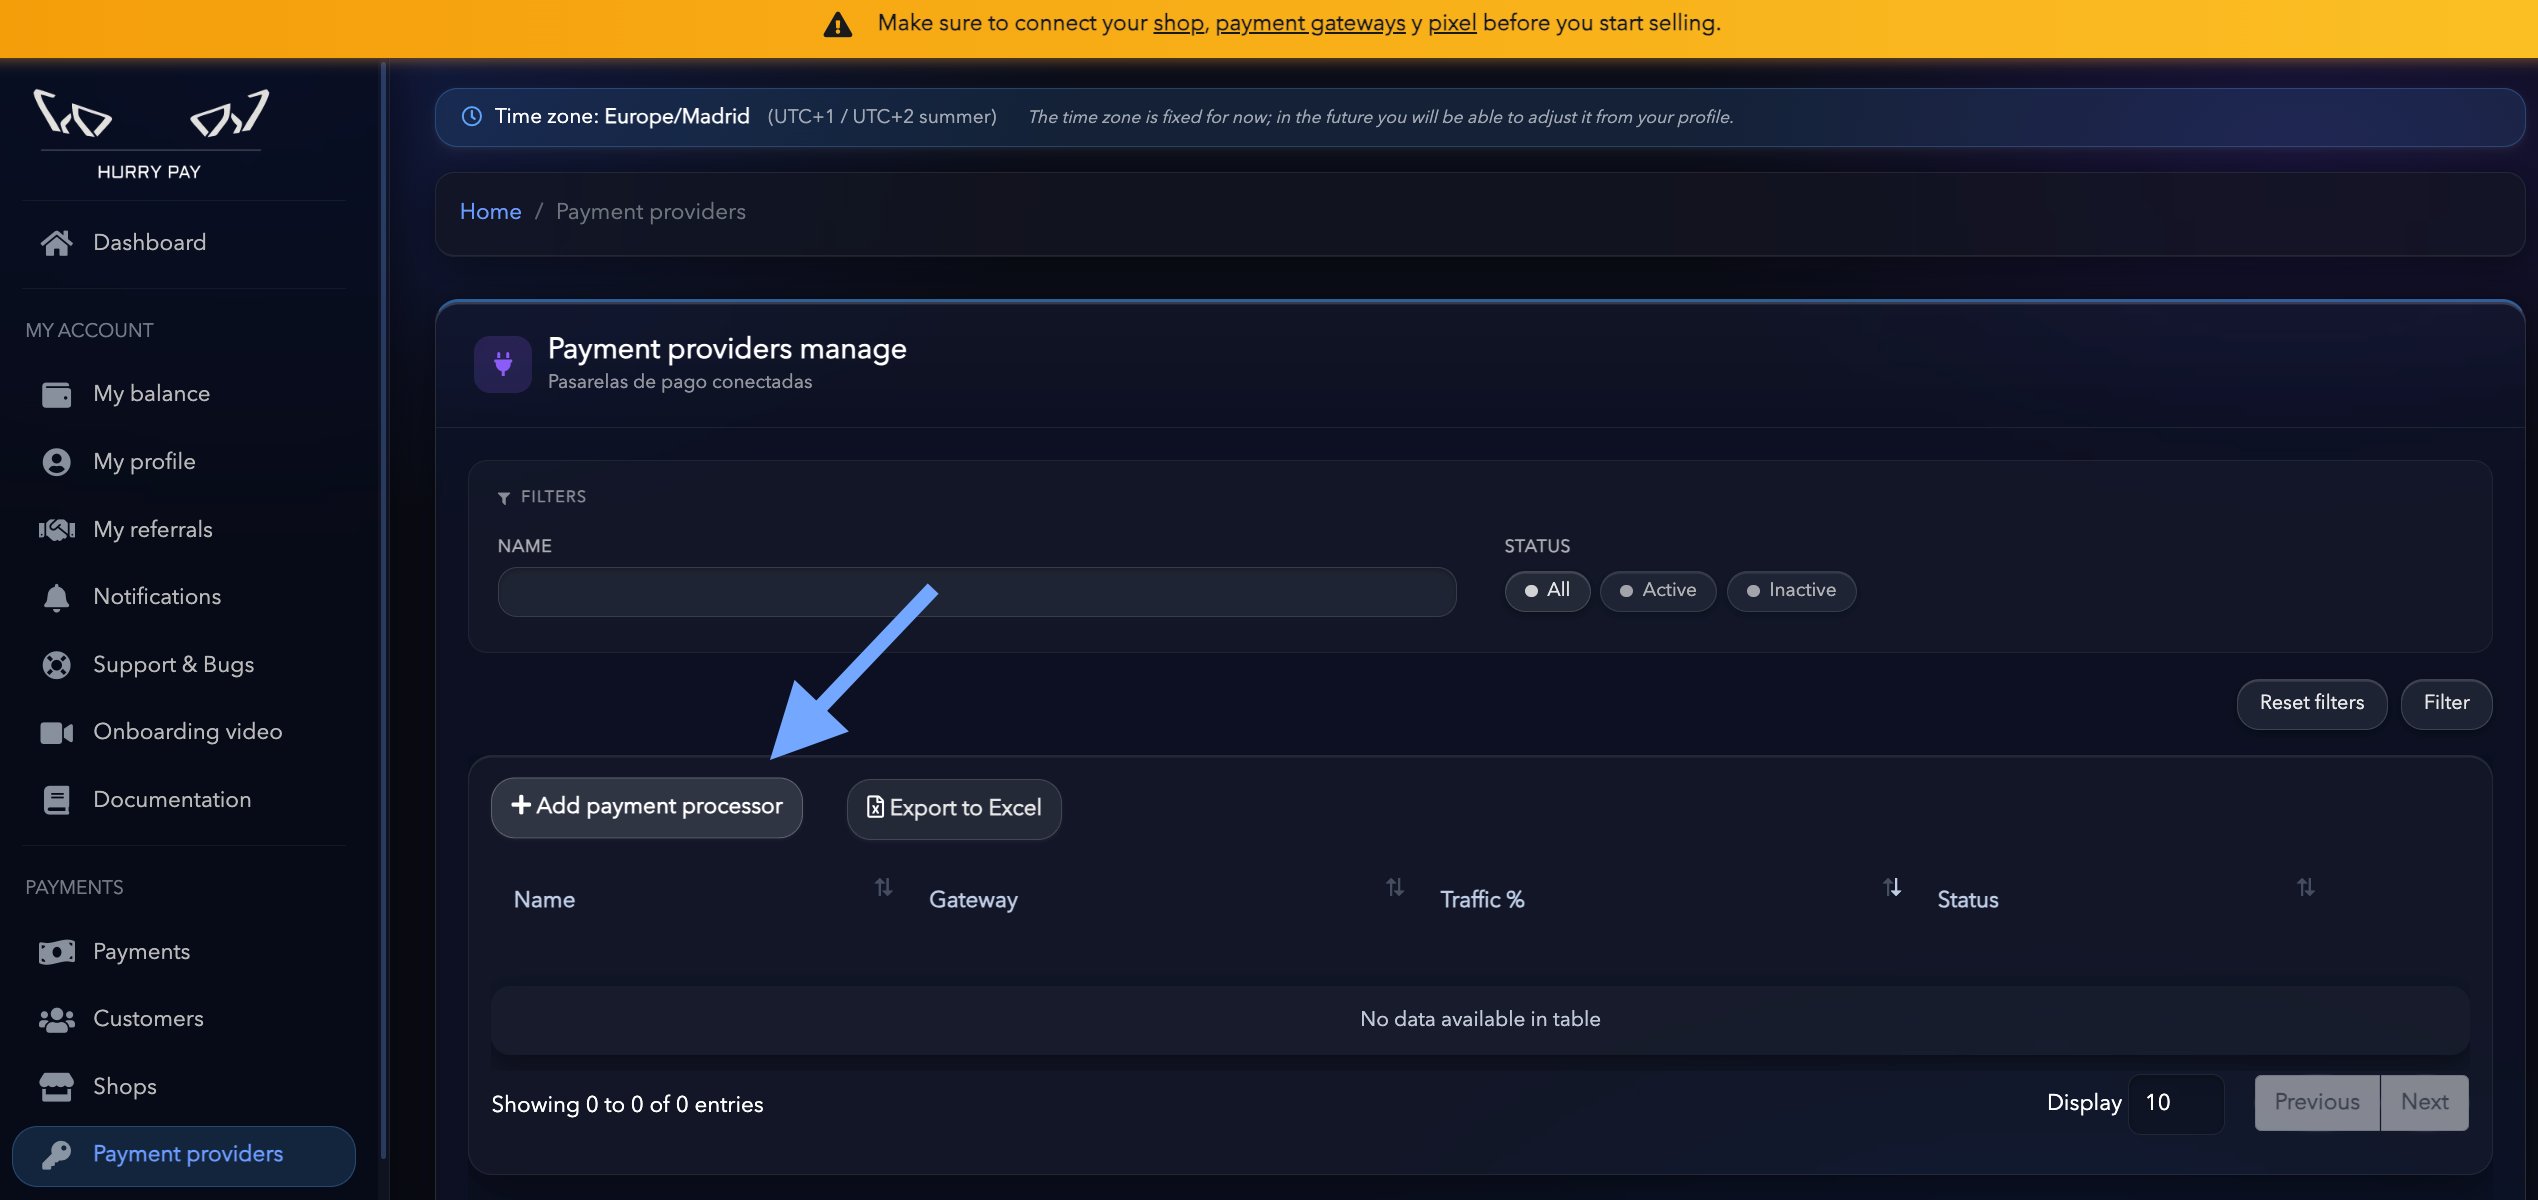
Esta guía explica cómo conectar tu cuenta de Whop a Hurry.
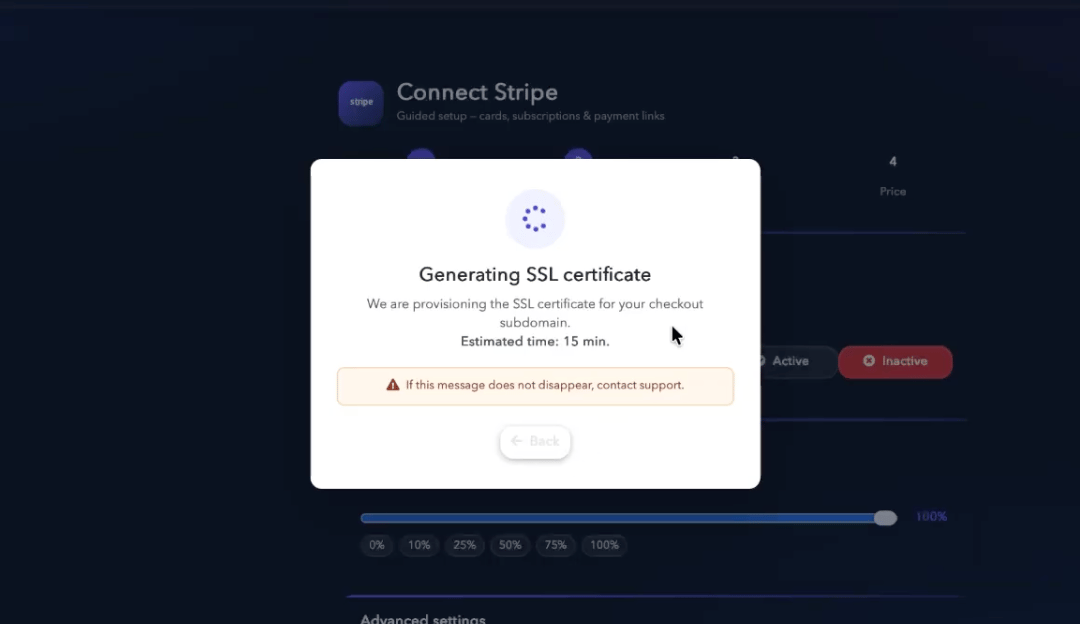
Antes de introducir las credenciales de Whop, es necesario configurar un subdominio desde el que se servirá el checkout.
***
## Paso 1. Configurar el dominio del checkout
Cada pasarela de pago utiliza un subdominio exclusivo para mostrar el checkout.
Lo habitual es utilizar un subdominio como:
```text theme={null}
checkout.tiendawhite.com
```
Este subdominio actuará como la dirección desde la que se mostrará el checkout a tus clientes.
### Crear el registro DNS
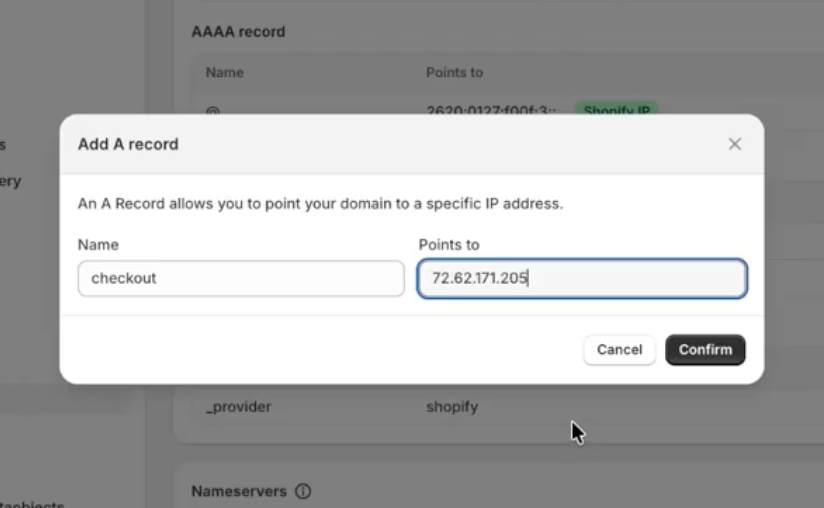
Accede al panel DNS de tu dominio y crea un registro **A** con la siguiente configuración:
| Tipo | Nombre | Valor |
| :--- | :------- | :------------ |
| A | checkout | 72.62.171.205 |
 Una vez propagado el registro DNS, podrás continuar con la configuración de Whop.
> **Nota:** La propagación DNS puede tardar desde unos minutos hasta varias horas dependiendo de tu proveedor de dominio.
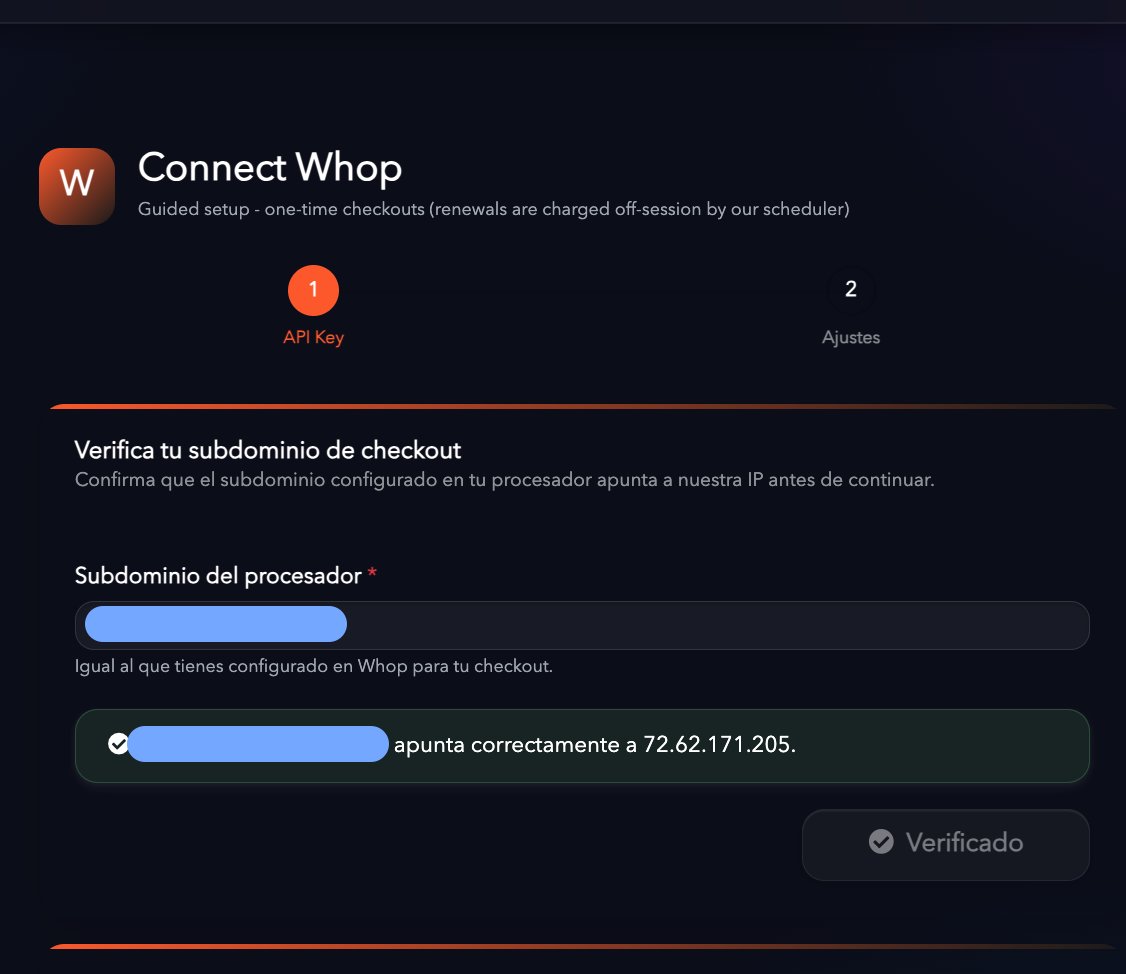
Una vez propagado el registro DNS, podrás continuar con la configuración de Whop.
> **Nota:** La propagación DNS puede tardar desde unos minutos hasta varias horas dependiendo de tu proveedor de dominio.
 ***
## Paso 2. Introducir las claves API
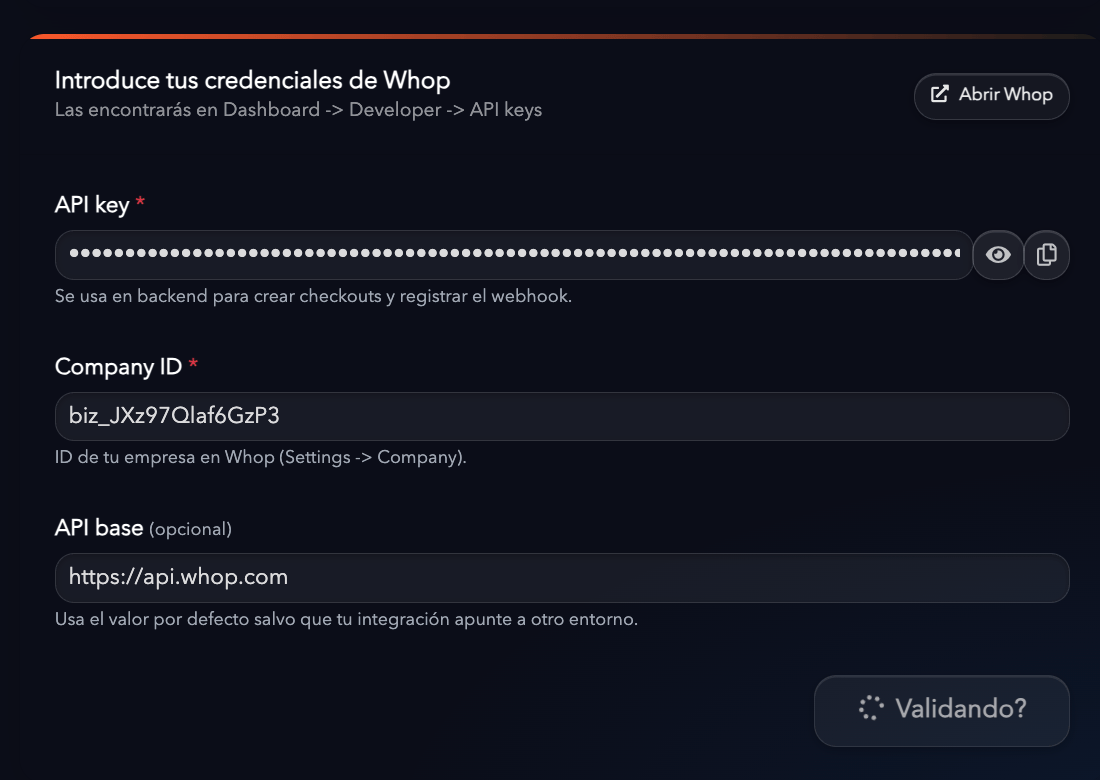
Desde el Dashboard de Whop accede a la parte de Desarrolladores:
***
## Paso 2. Introducir las claves API
Desde el Dashboard de Whop accede a la parte de Desarrolladores:
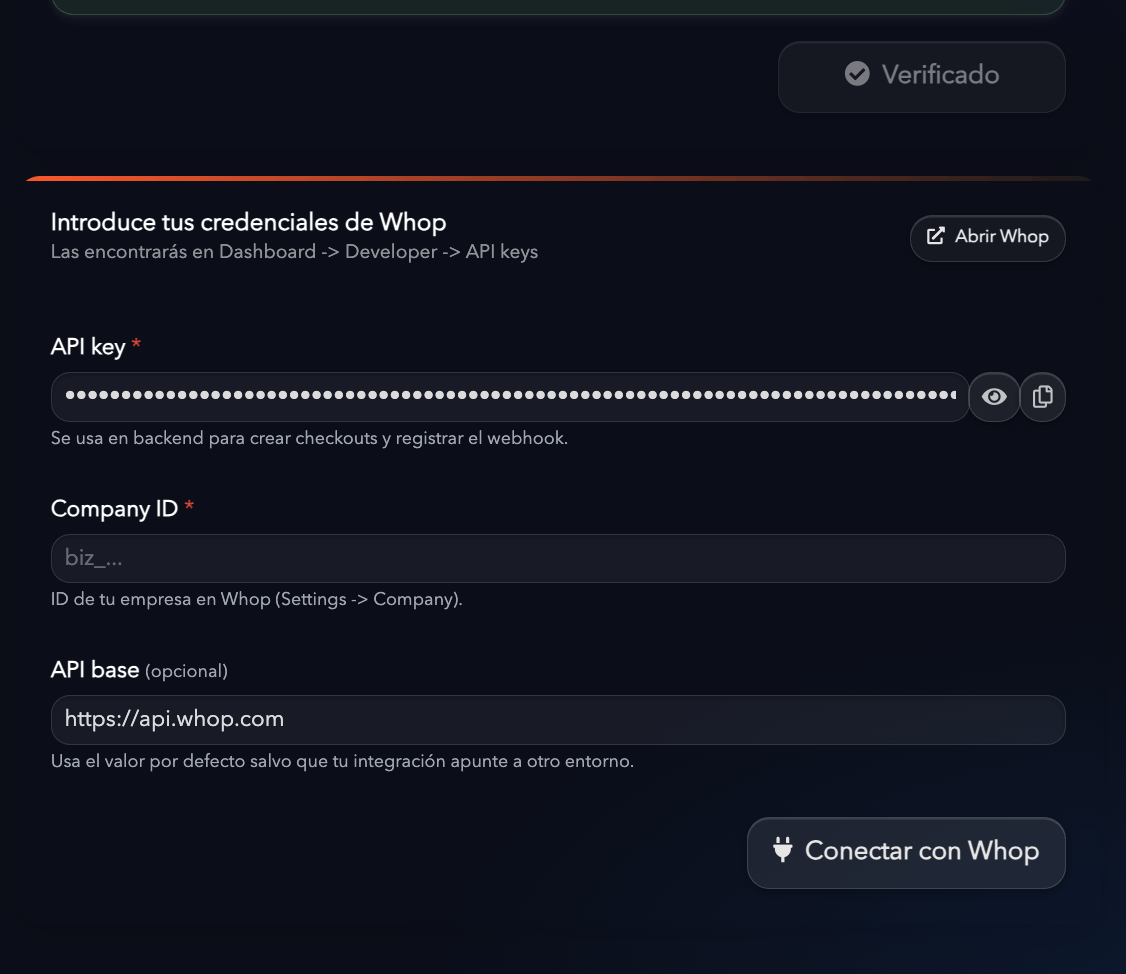
 **IMPORTANTE**: Seleccionar el role "**Owner**" al momento de crear la clave API, si no seleccionas esto, **no funcionará correctamente** la conexión con el C
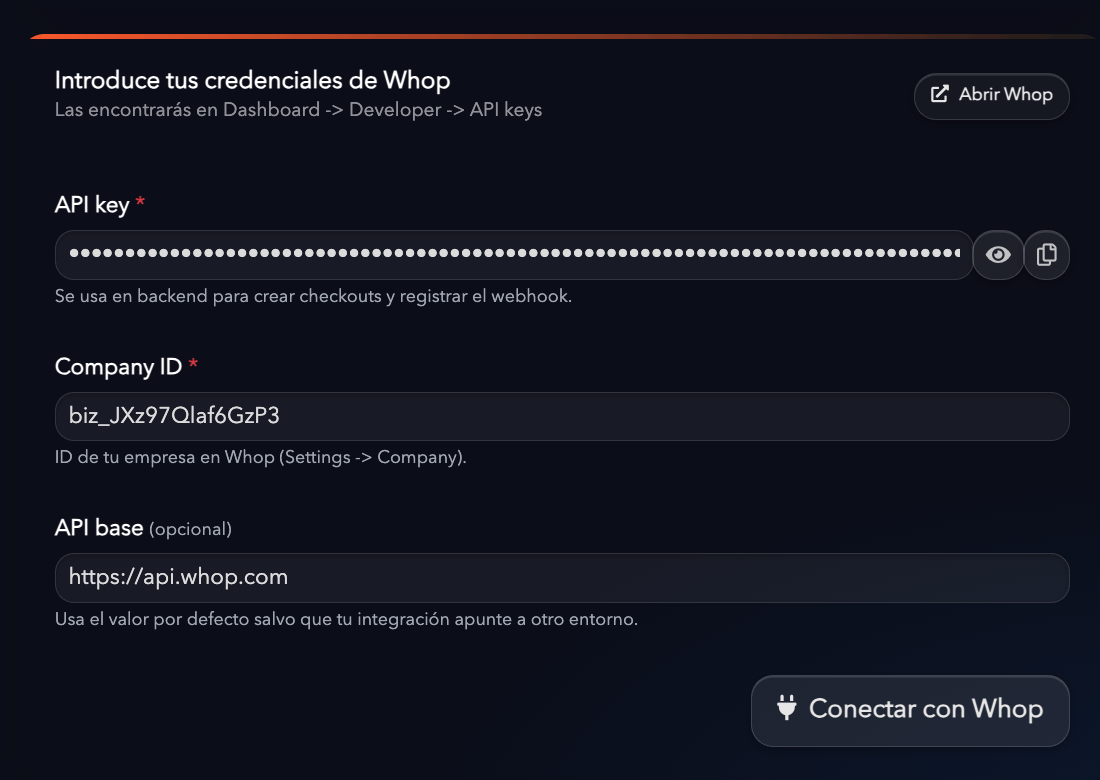
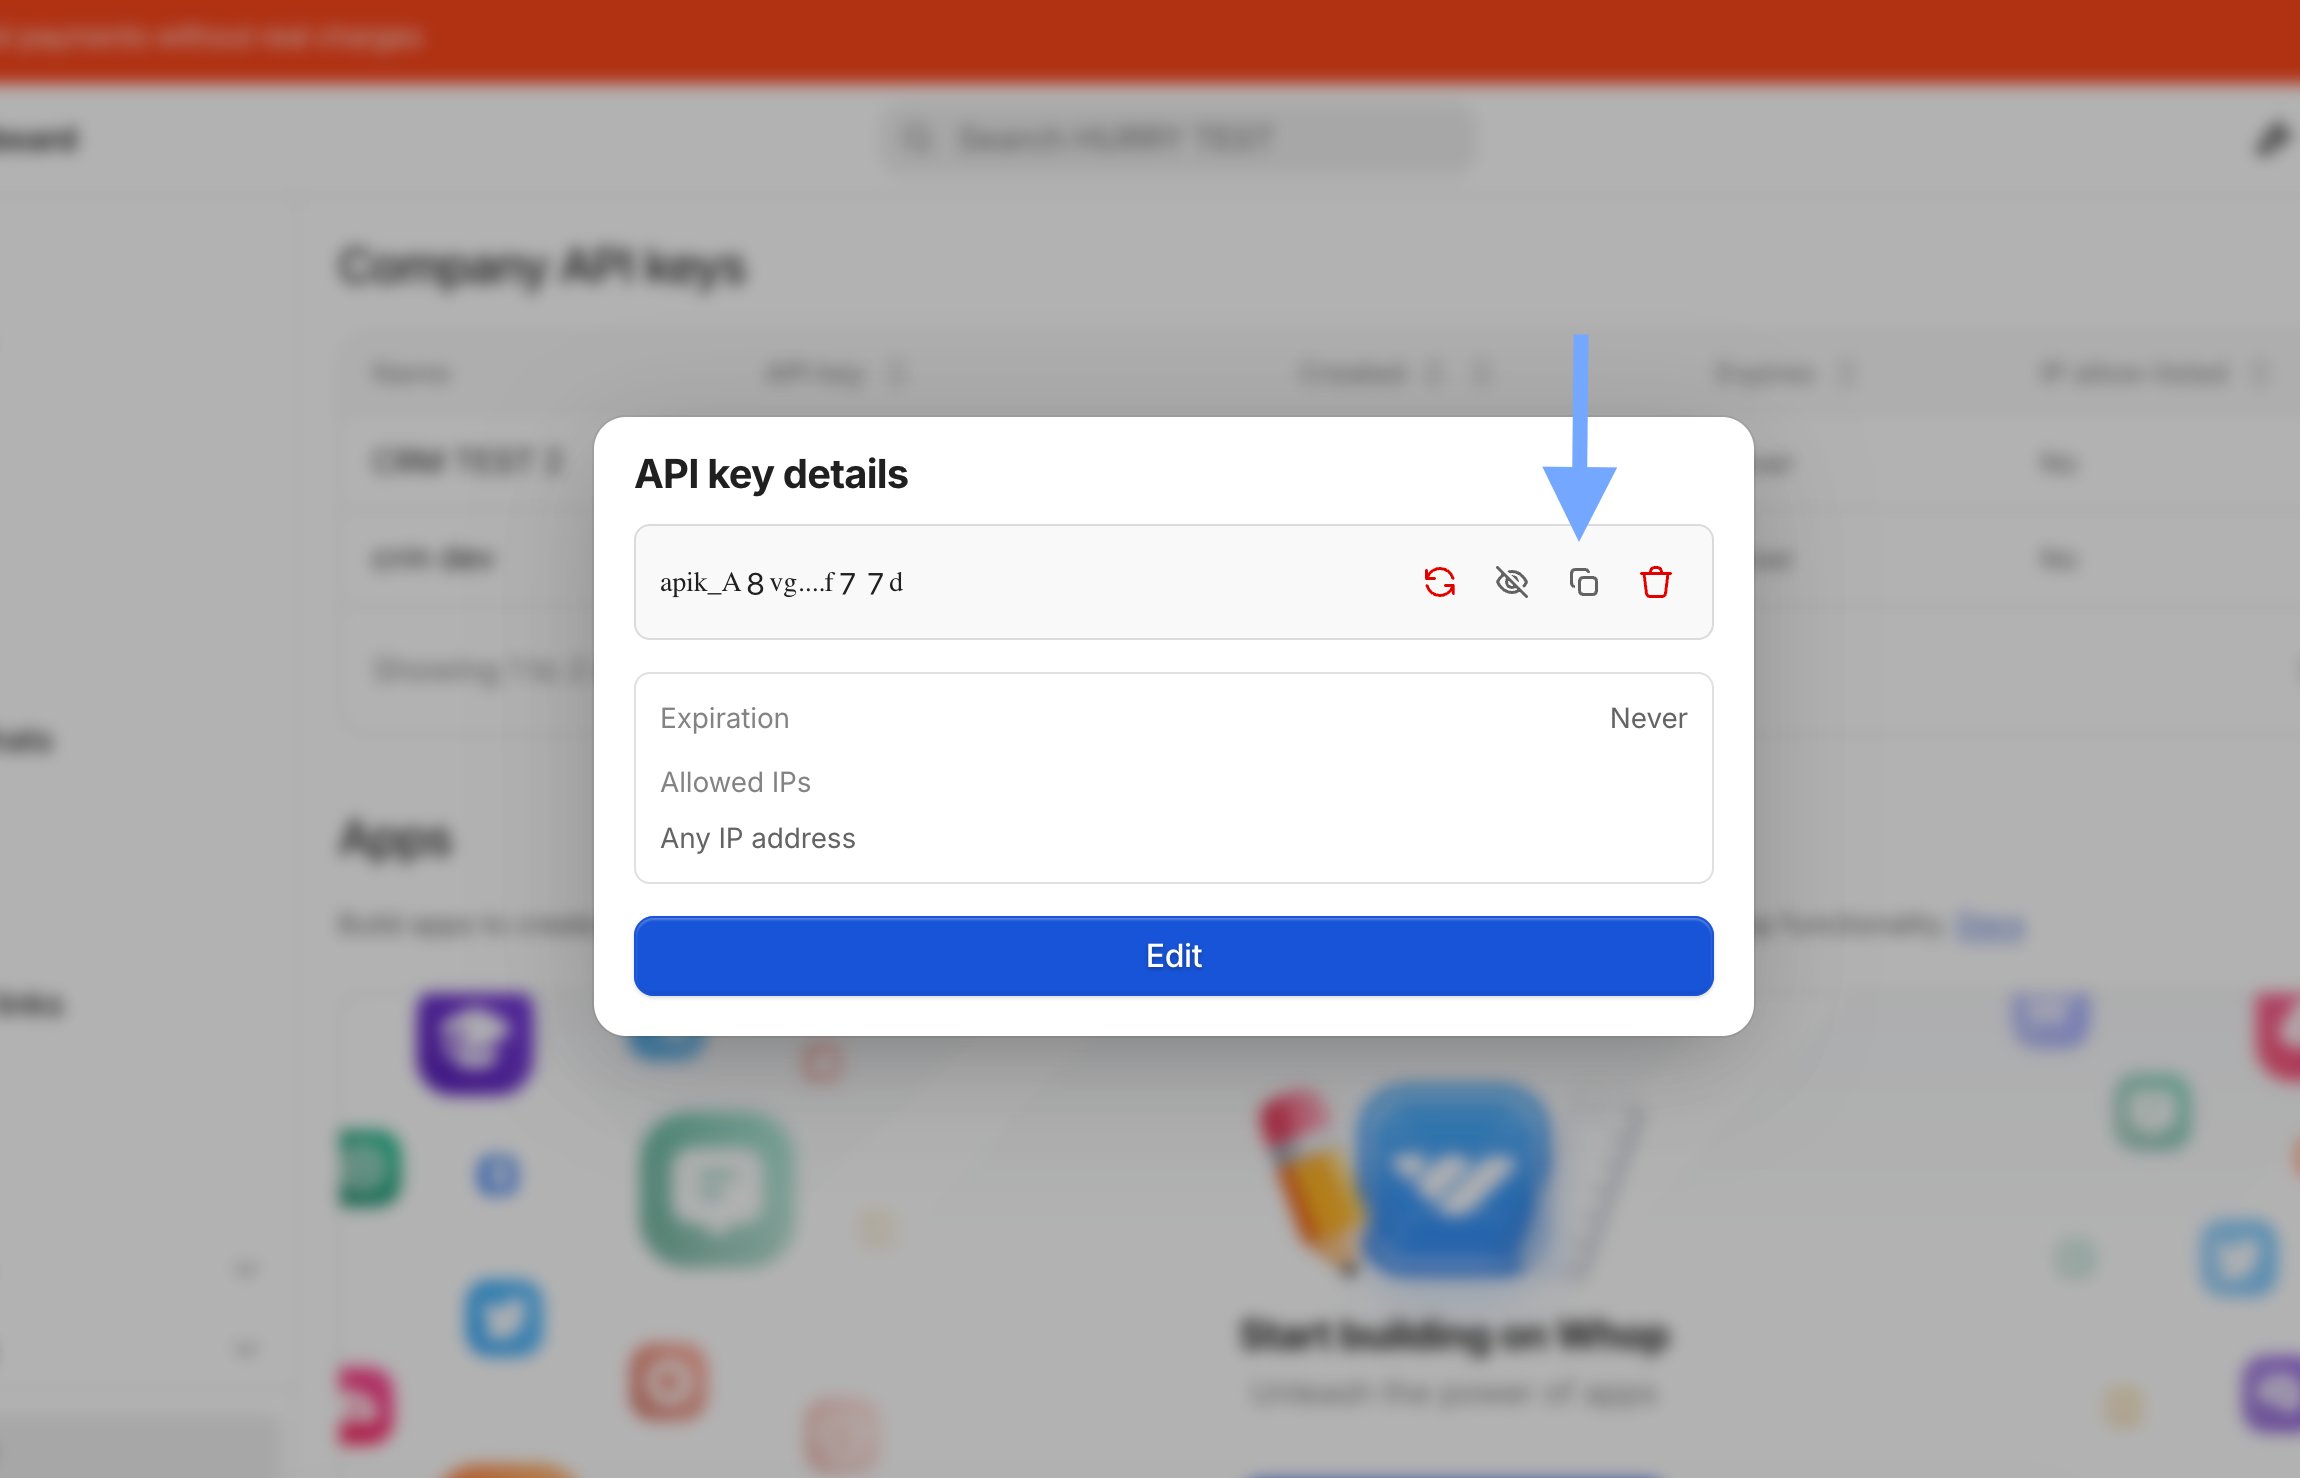
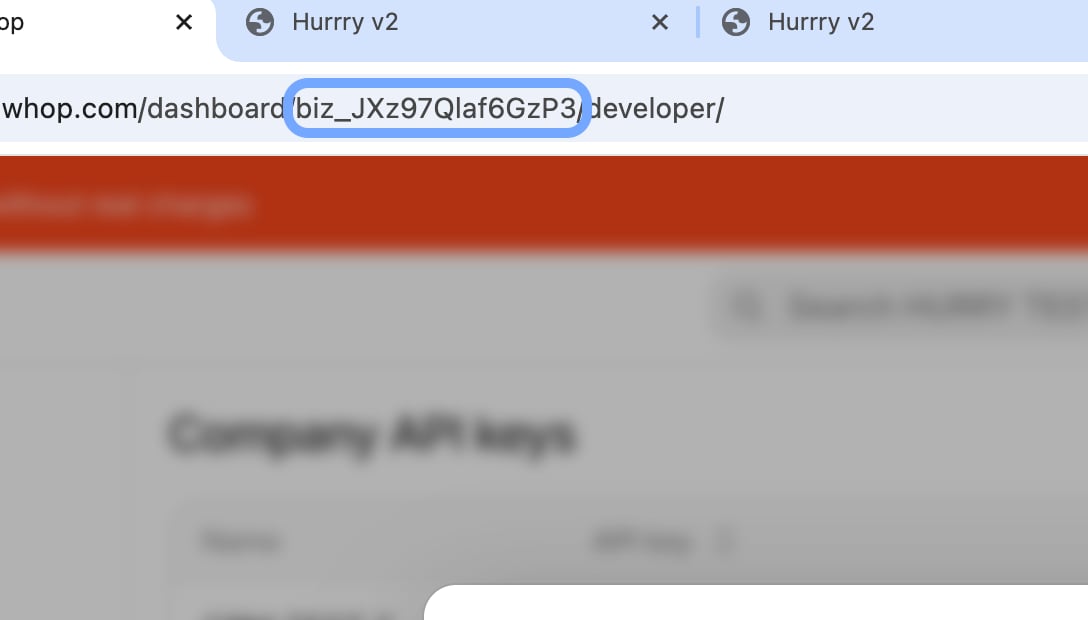
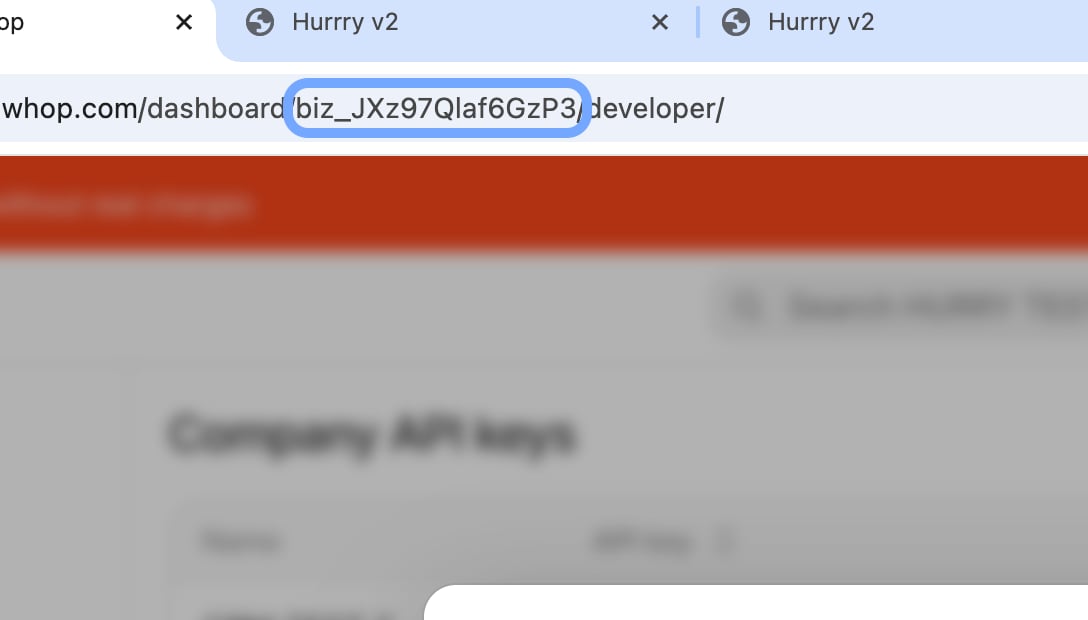
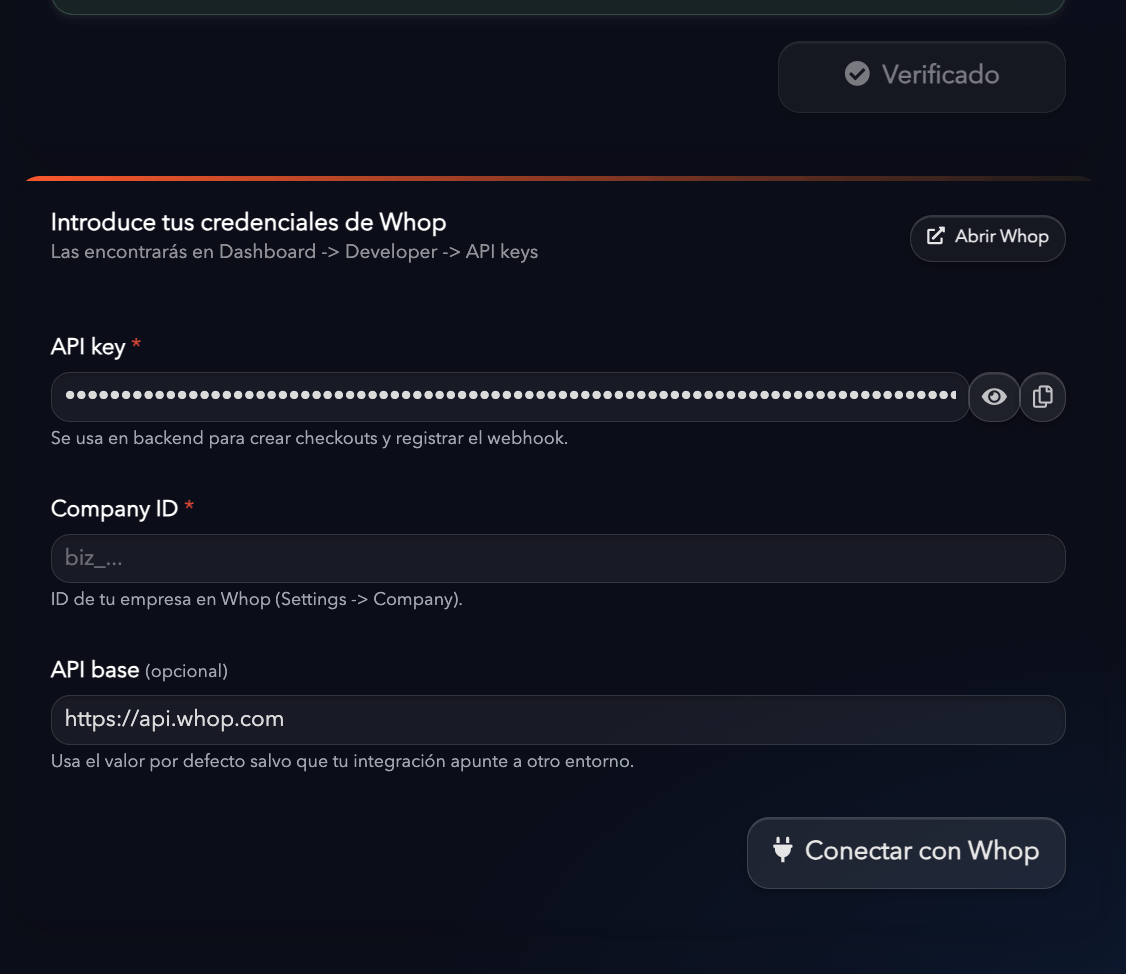 Para conseguir el **Company ID**, solo debemos fijarnos en la URL del navegador de Whop, siempre comienza con **biz\_XXXXX**
 ## Paso 3. Nombre de la pasarela
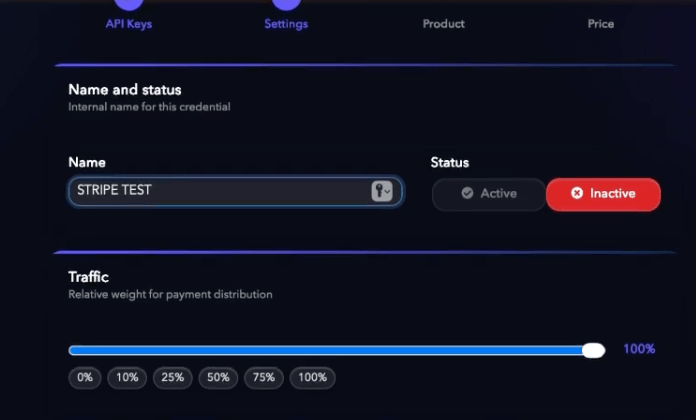
Asigna un nombre para identificar esta conexión.
Este nombre es únicamente interno y resulta útil cuando una misma tienda utiliza varias cuentas de Whop.
**Ejemplos:**
* Whop Principal
* Whop España
* Whop Europa
## Paso 3. Nombre de la pasarela
Asigna un nombre para identificar esta conexión.
Este nombre es únicamente interno y resulta útil cuando una misma tienda utiliza varias cuentas de Whop.
**Ejemplos:**
* Whop Principal
* Whop España
* Whop Europa
 ***
## Paso 4. Porcentaje de tráfico
Indica qué porcentaje de los pagos quieres enviar a esta cuenta de Whop.
Si únicamente tienes una pasarela conectada, puedes dejar el valor en **100%**.
Si utilizas varias pasarelas, podrás repartir el tráfico entre ellas según el porcentaje que desees.
***
## Paso 5. Guardar
Una vez completados todos los campos, pulsa **Guardar**.
Hurry comprobará automáticamente la conexión con Whop y configurará internamente los webhooks necesarios, por lo que no tendrás que realizar ninguna configuración adicional en Whop.
***
## Paso 4. Porcentaje de tráfico
Indica qué porcentaje de los pagos quieres enviar a esta cuenta de Whop.
Si únicamente tienes una pasarela conectada, puedes dejar el valor en **100%**.
Si utilizas varias pasarelas, podrás repartir el tráfico entre ellas según el porcentaje que desees.
***
## Paso 5. Guardar
Una vez completados todos los campos, pulsa **Guardar**.
Hurry comprobará automáticamente la conexión con Whop y configurará internamente los webhooks necesarios, por lo que no tendrás que realizar ninguna configuración adicional en Whop.
 ***
## ¡Listo!
Tu cuenta de Whop ya está conectada y lista para comenzar a procesar pagos.
Si en el futuro deseas añadir otra cuenta de Whop o cualquier otra pasarela compatible, simplemente repite este proceso.
***
## ¡Listo!
Tu cuenta de Whop ya está conectada y lista para comenzar a procesar pagos.
Si en el futuro deseas añadir otra cuenta de Whop o cualquier otra pasarela compatible, simplemente repite este proceso.