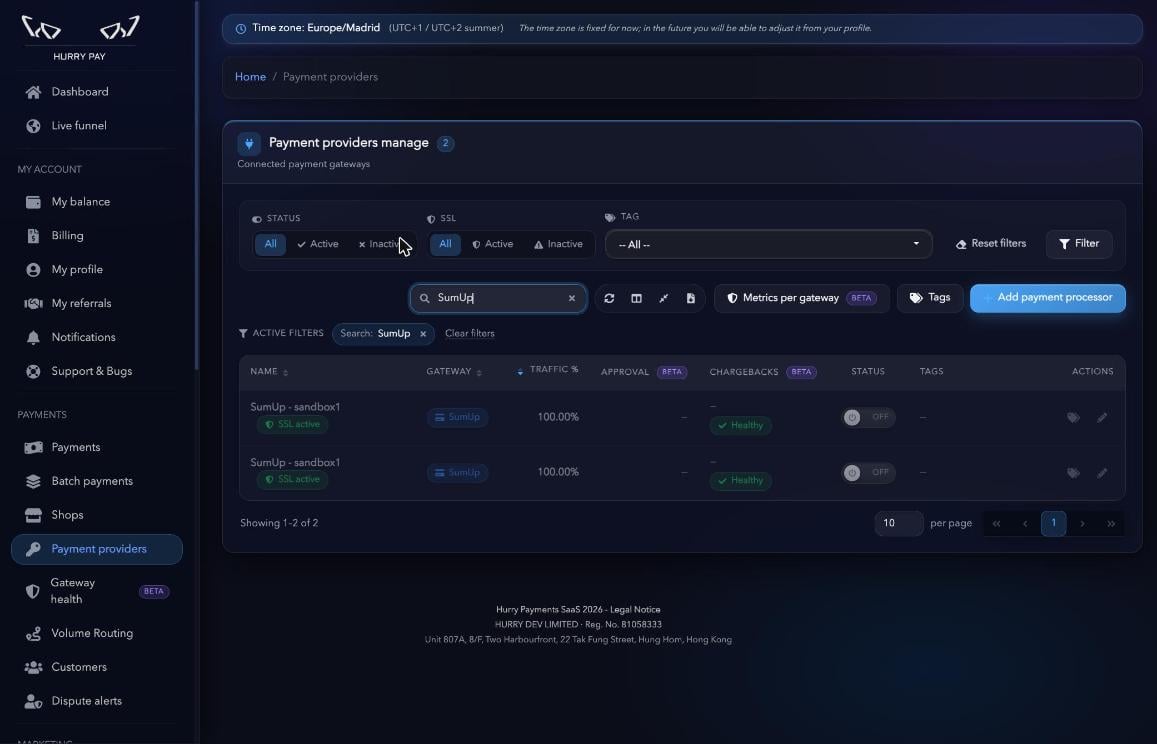
Note: SumUp checkouts are always created in EUR. If the order is in another currency, the amount is converted to EUR before it’s charged.
Before you start
You need two things:- A SumUp account with access to API keys (SumUp Dashboard → Developers → API keys).
- A subdomain pointing to Hurry’s IP, from which the checkout will be served.
Create the DNS record
Go to your domain’s DNS panel and create an A record with the following settings:Note: DNS propagation can take anywhere from a few minutes to several hours depending on your domain provider.
Step 1. Add the gateway
In the side menu, go to Payment providers and click Add payment processor.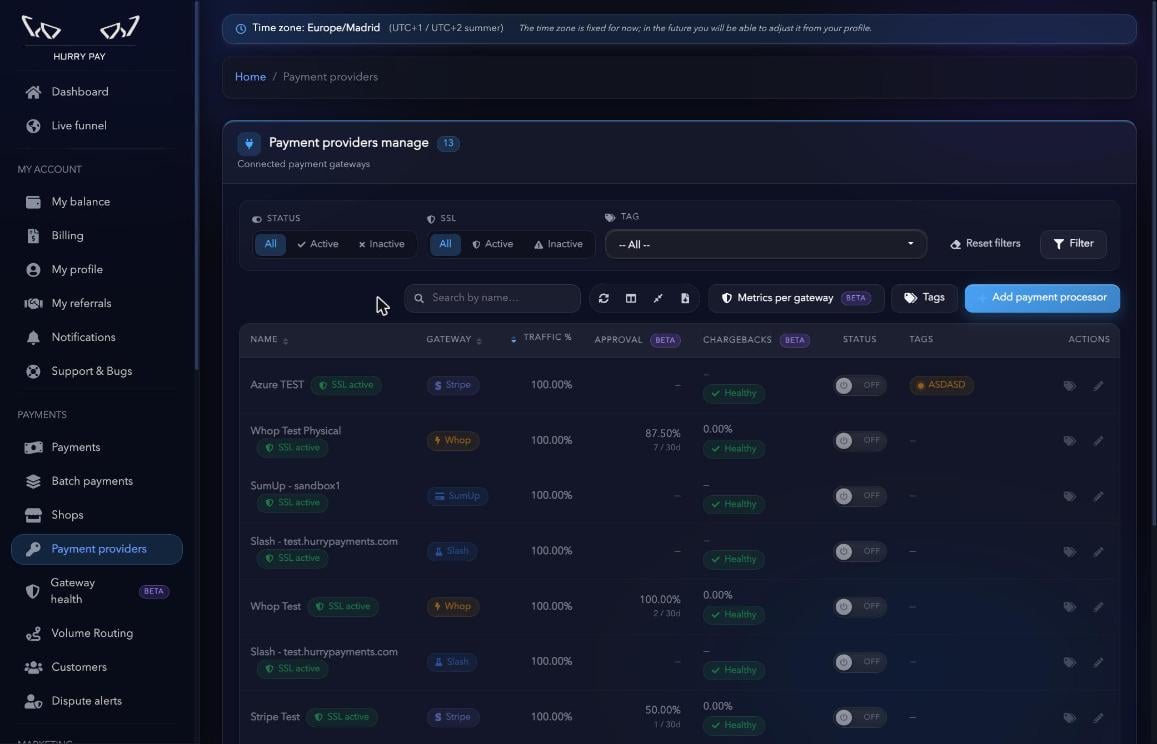
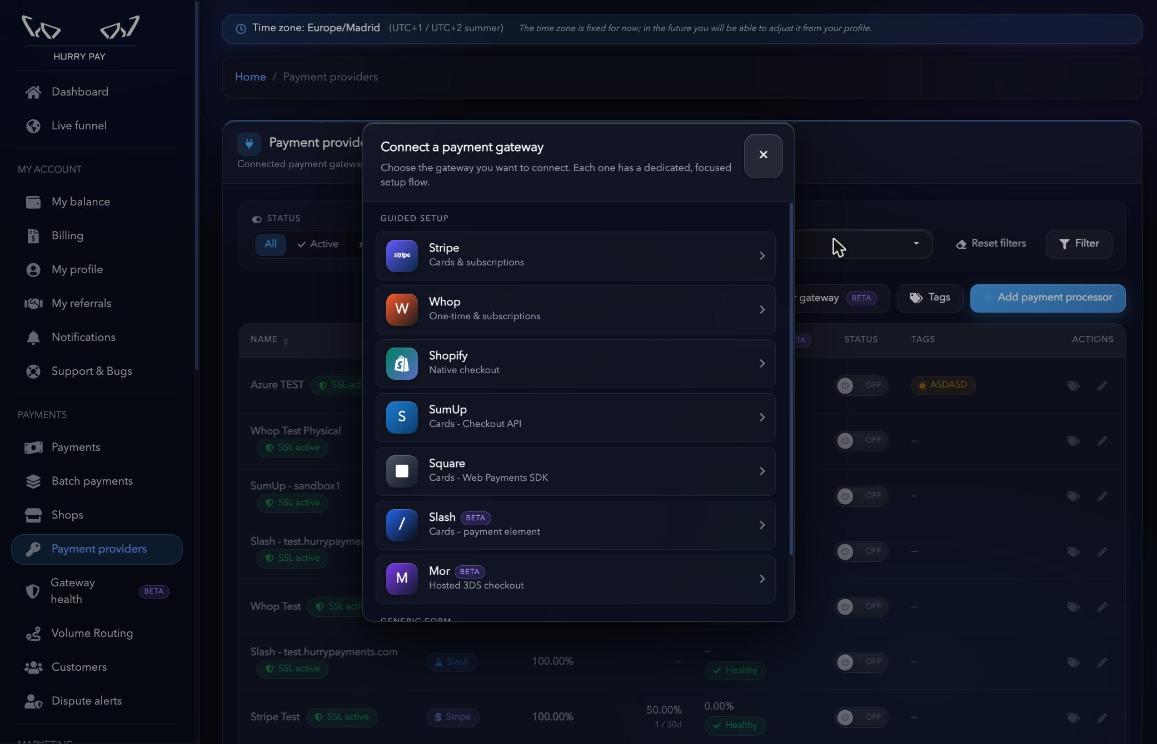
Step 2. Enter the API keys
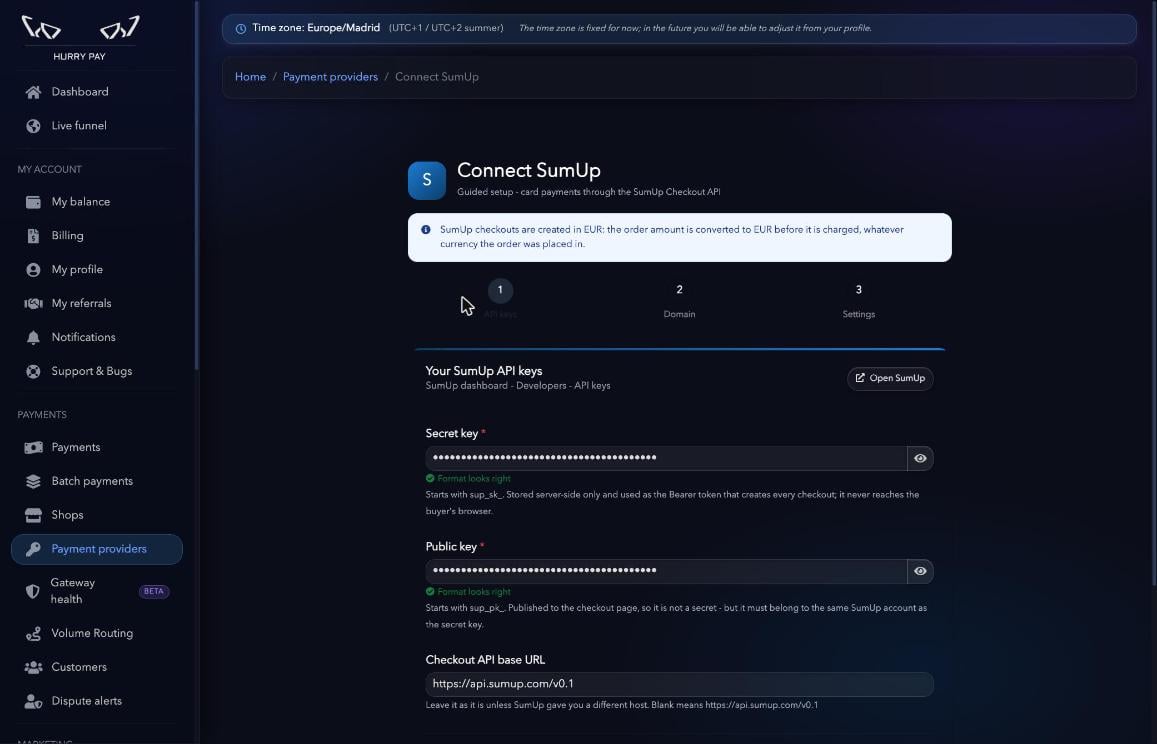
Copy the keys from developer.sumup.com/api-keys (you can also open it with the Open SumUp button) and paste them into the form:
When each key’s format is correct, the Format looks right message appears.
Step 3. Verify the checkout domain
In White-label subdomain, enter the subdomain you set up (for examplecheckout.yourstore.com) and click Verify DNS.
If the record points correctly to Hurry’s IP, you’ll see the confirmation message and the button changes to Verified. Click Next.
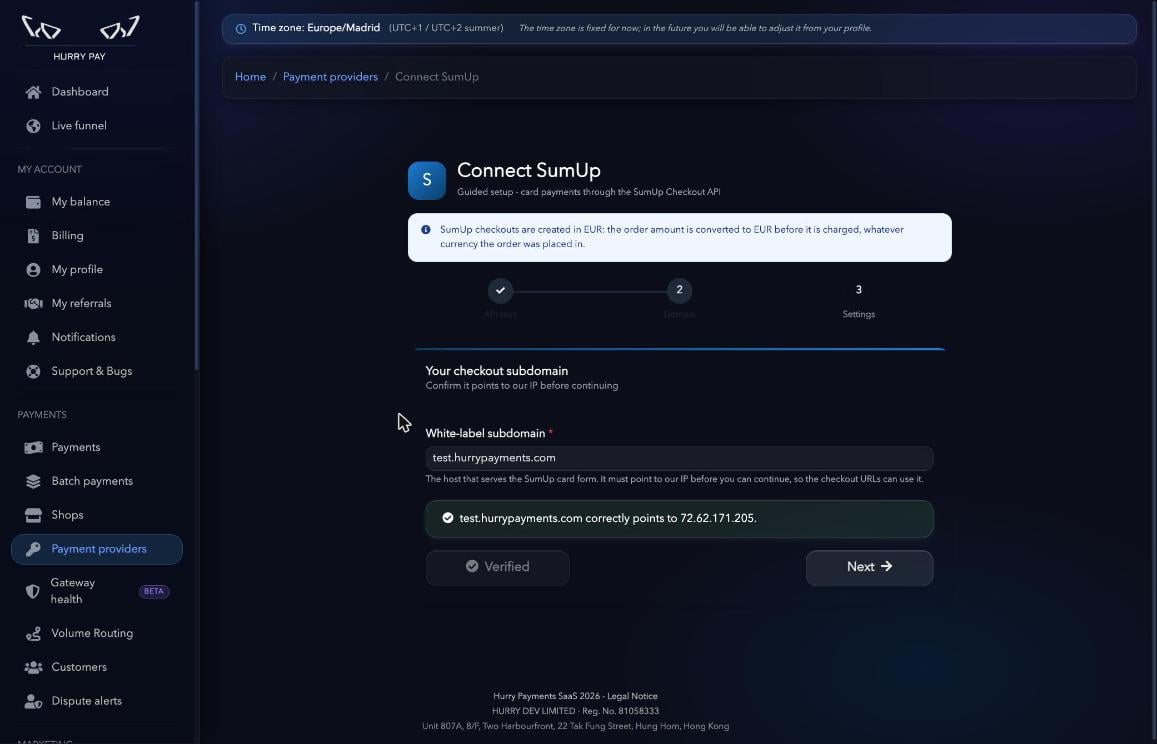
Note: You can’t continue until the subdomain points to our IP. If verification fails, check the A record and wait for it to propagate.
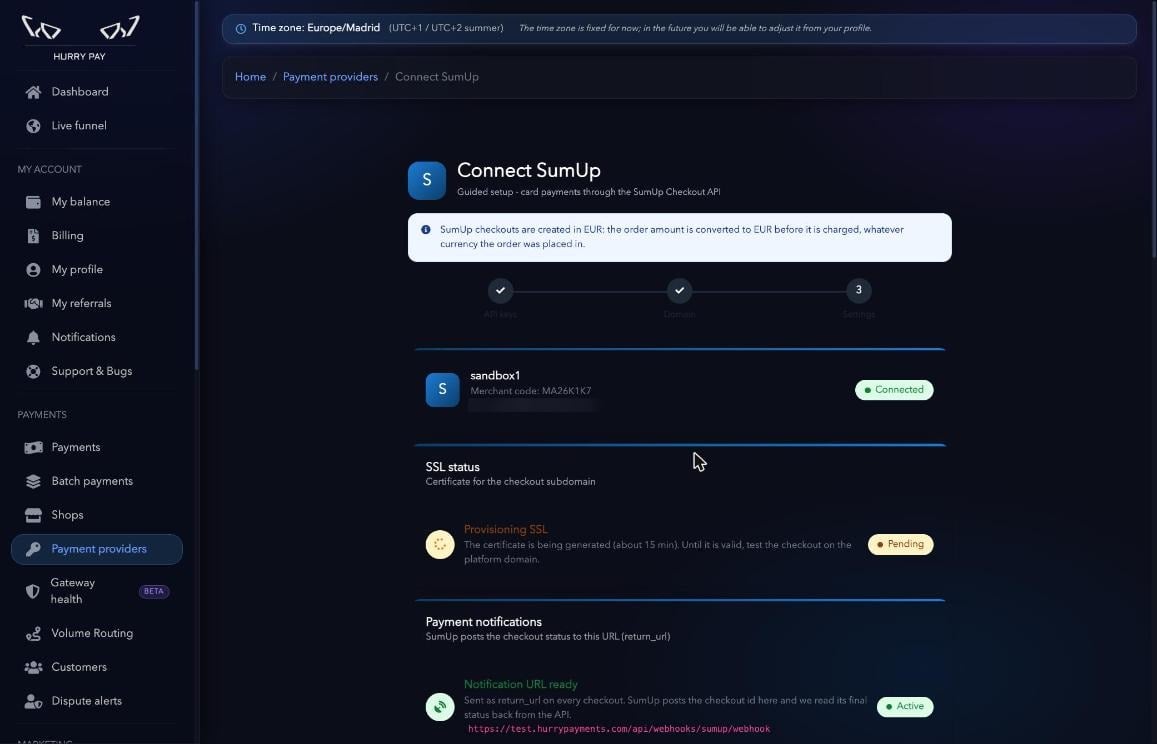
Step 4. Review the connection status
The settings screen starts with three information blocks:- Connected account: your SumUp account name and its merchant code, with the status Connected.
- SSL status: the subdomain certificate is generated automatically and takes about 15 minutes. While it shows Pending, test the checkout on the platform domain.
- Payment notifications: the notification URL is already active. Hurry sends it as the
return_urlon every checkout, so you don’t need to register any webhook in SumUp.
Step 5. Name, status and traffic
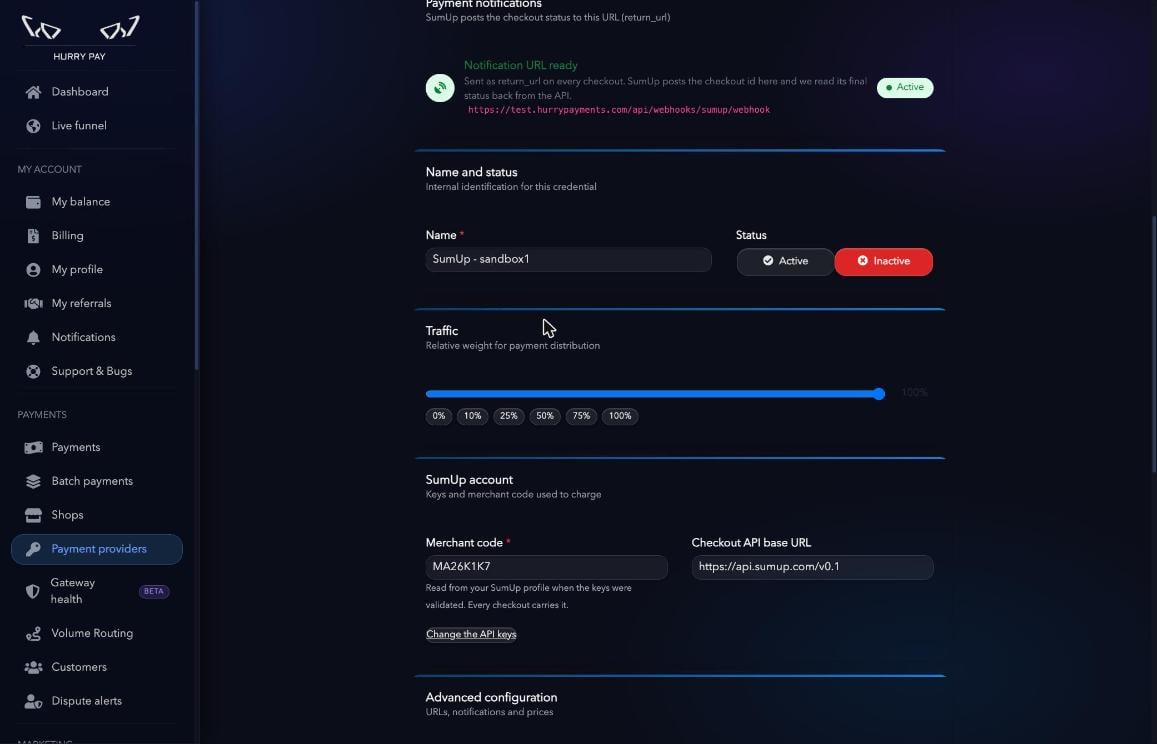
- Name: internal name to identify the gateway. It’s prefilled with your SumUp account name; change it if you’ll connect more than one so you don’t mix them up.
- Status:
ActiveorInactive. An inactive gateway stays saved but doesn’t receive payments until you activate it. - Traffic: relative weight used to split payments between your gateways.
- Merchant code: read from your SumUp profile when the keys are validated. You don’t need to change it.
Step 6. Advanced settings (optional)
The default values work in most cases.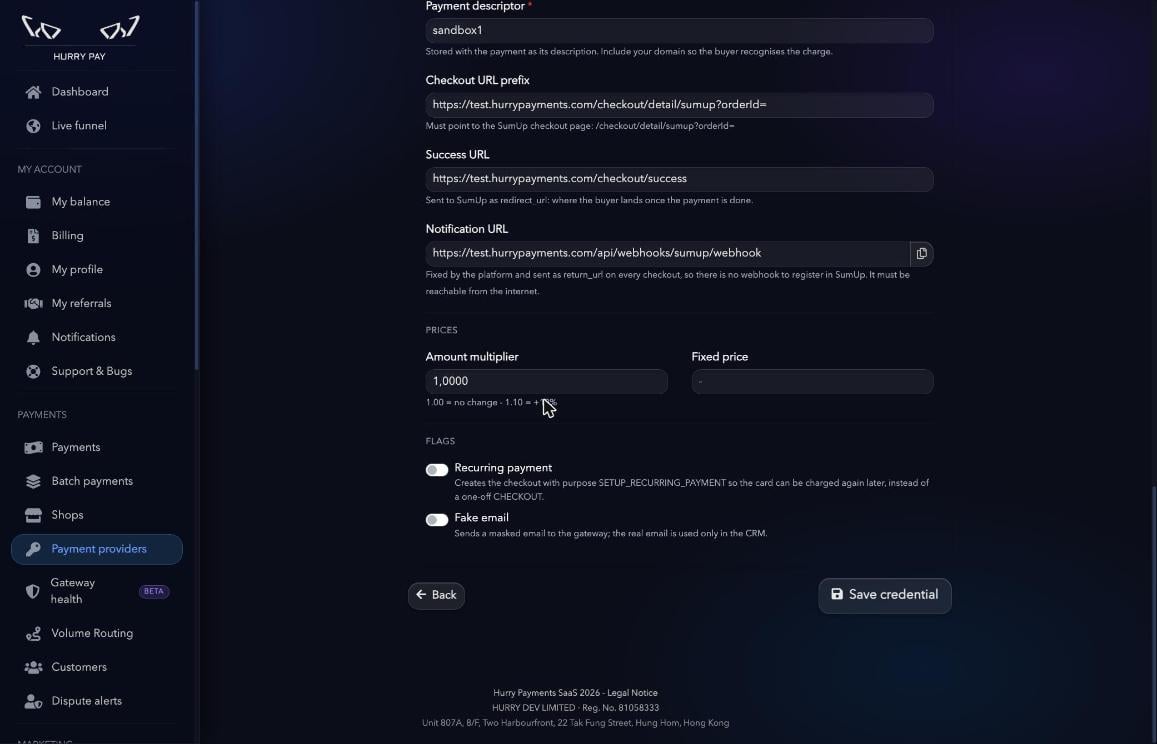
Step 7. Save
Click Save credential. You’ll see the Credential created successfully message.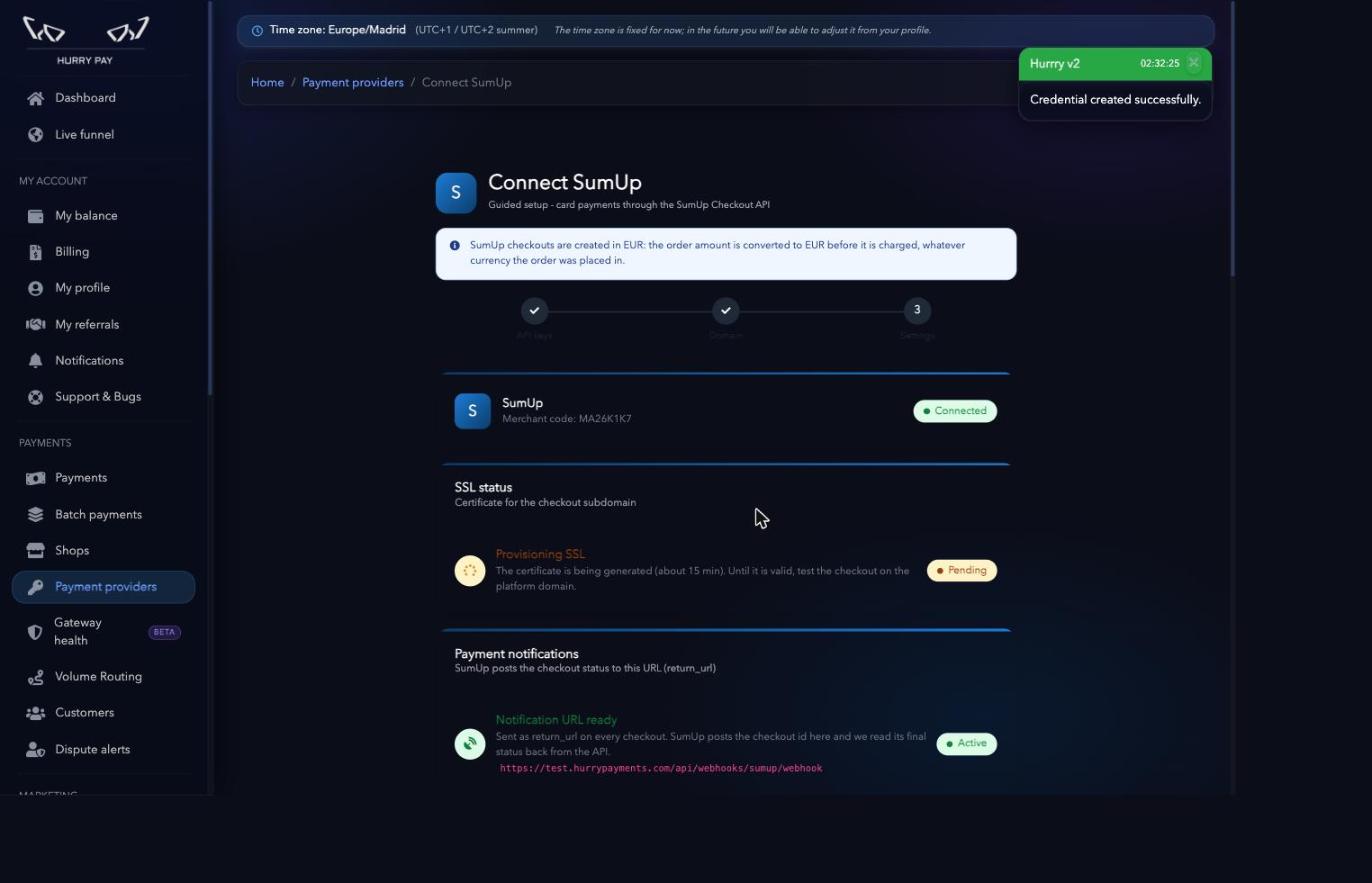
Done!
Your SumUp account now appears in Payment providers. From the list you can turn it on or off with the Status toggle and see the SSL status.