Create a new store
From the Dashboard, go to Stores and click New store.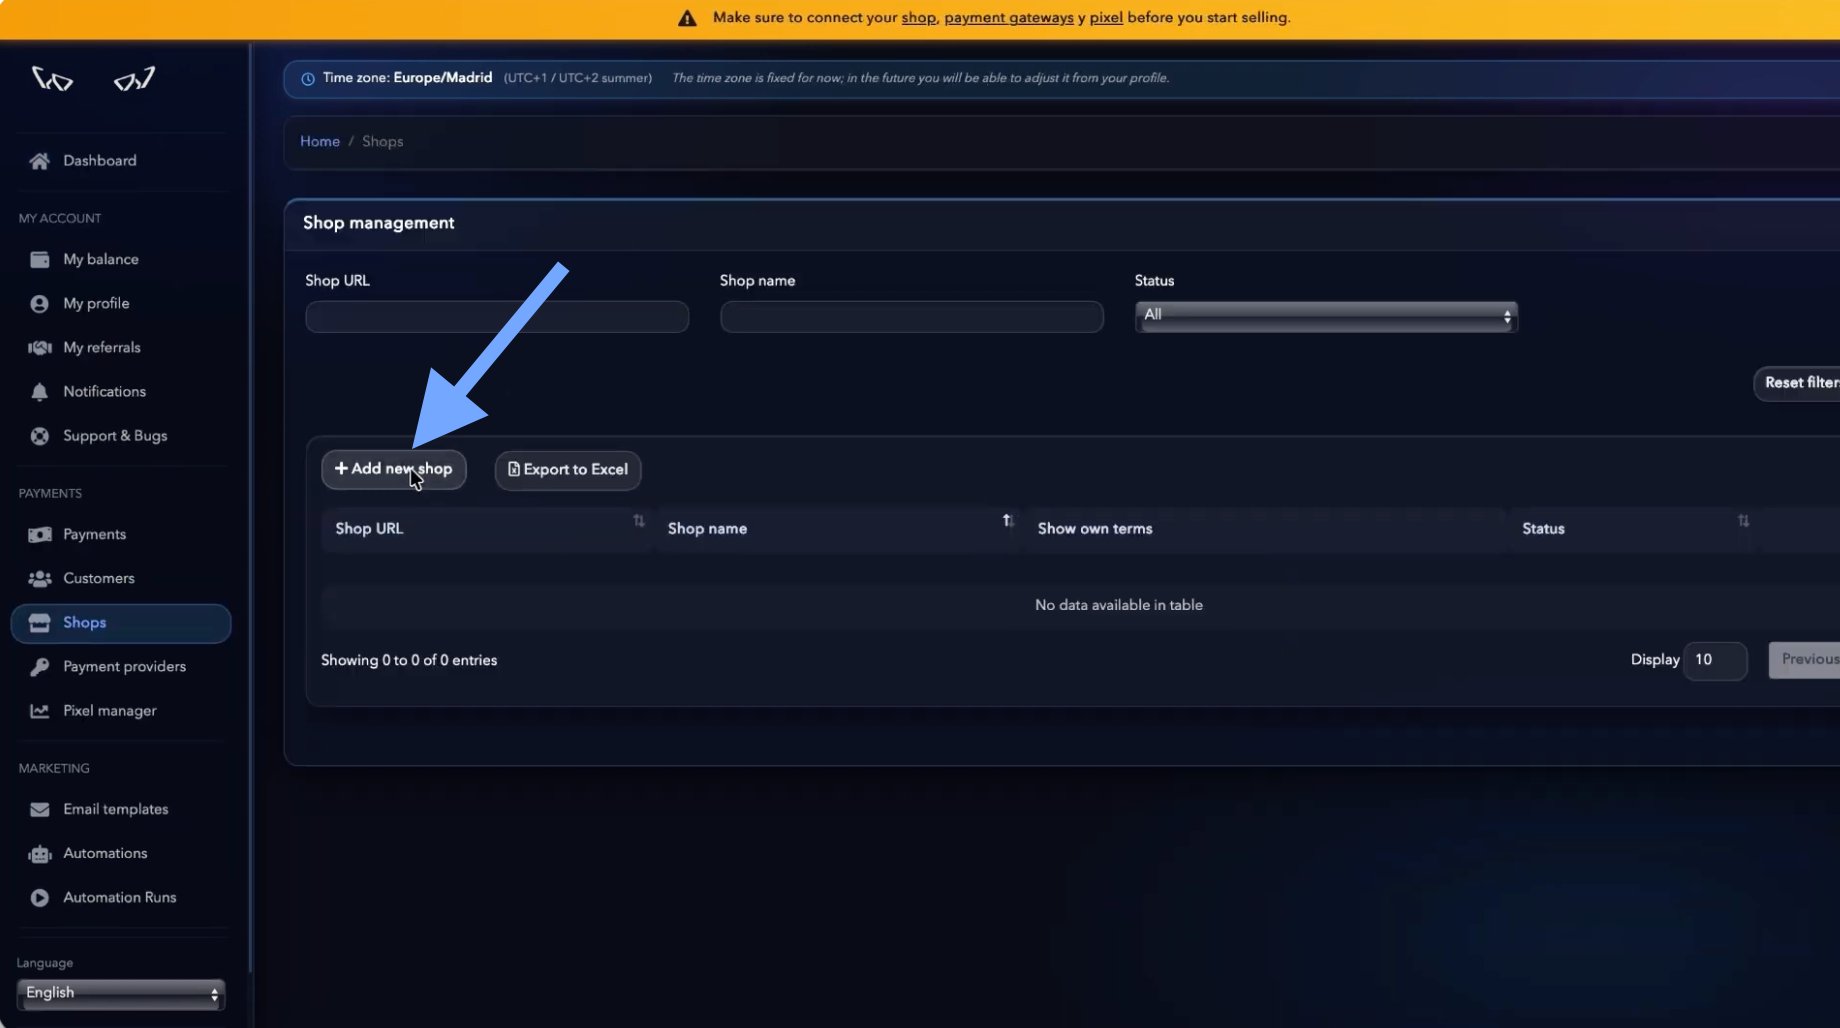
Basic information
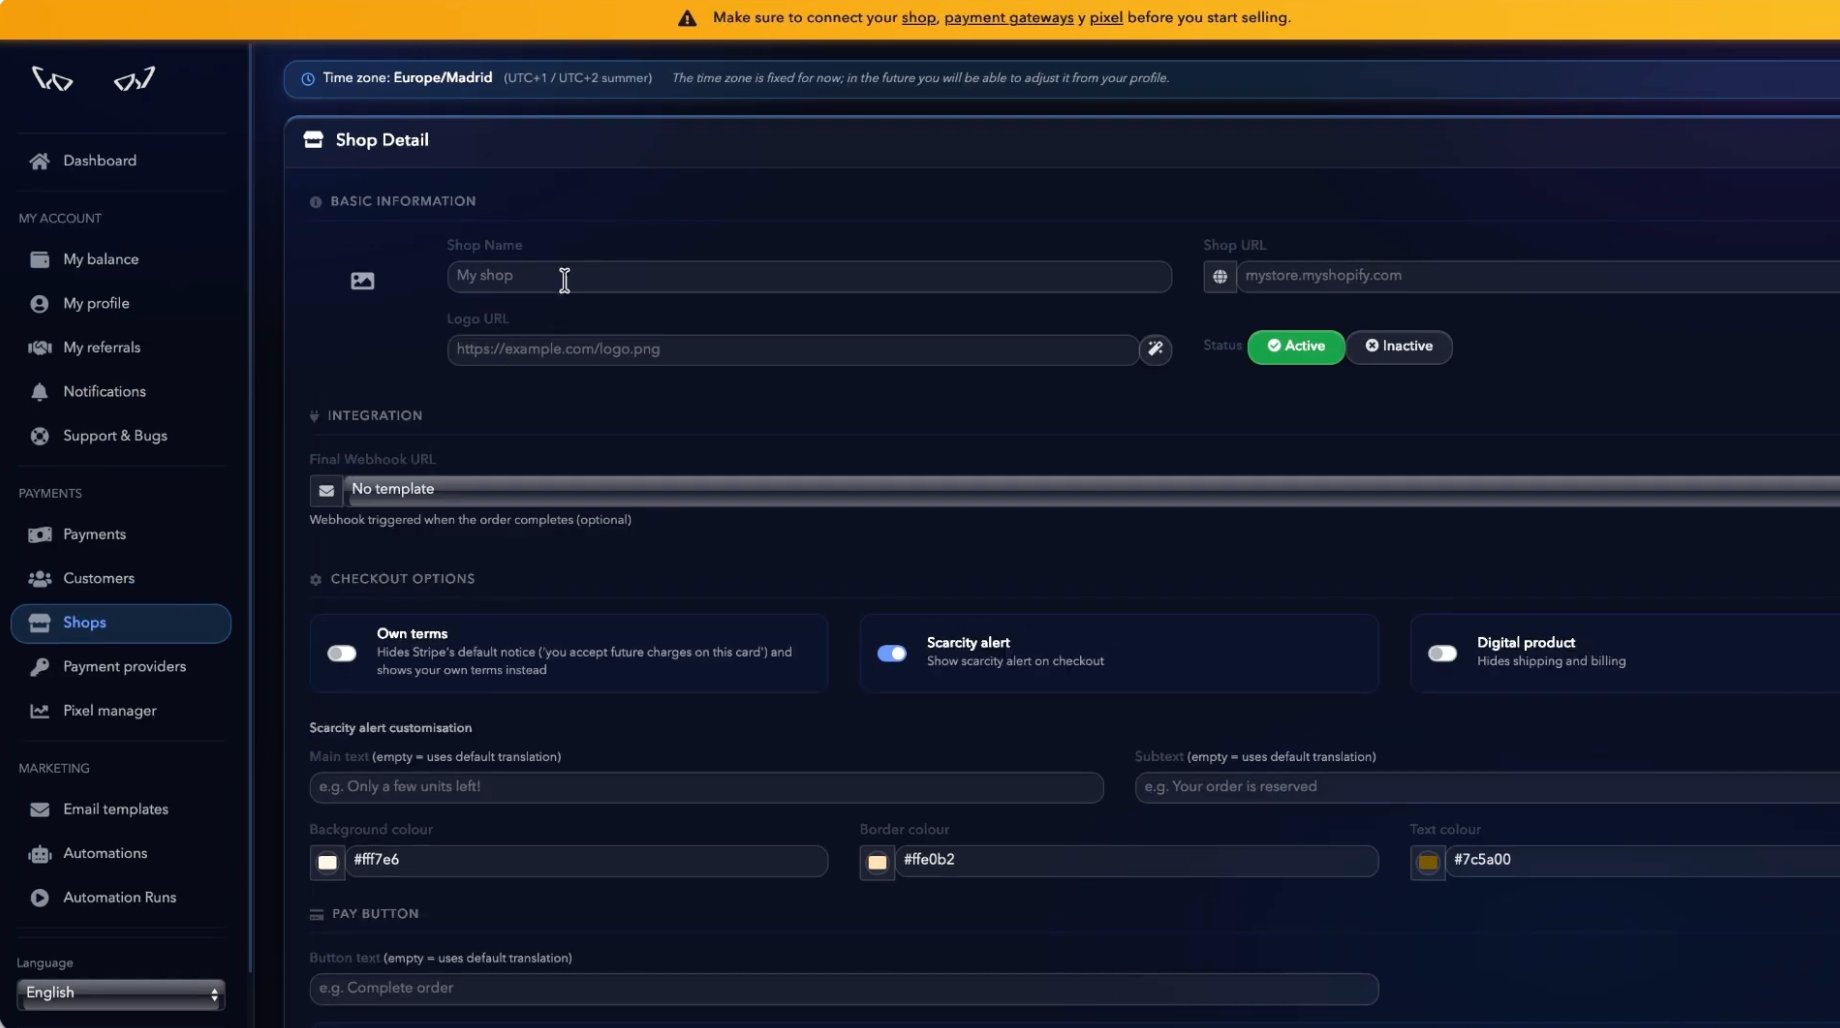
To create a store, fill in the following fields:Name
Enter a name to identify the store within Hurry. This name is only visible to users in your organization, and you can change it later.Shopify URL
You must enter the original Shopify URL, not your store’s custom domain. The URL has the format:xxxxx-xx.myshopify.com
You can find it in the Shopify admin under:
Settings → Domains
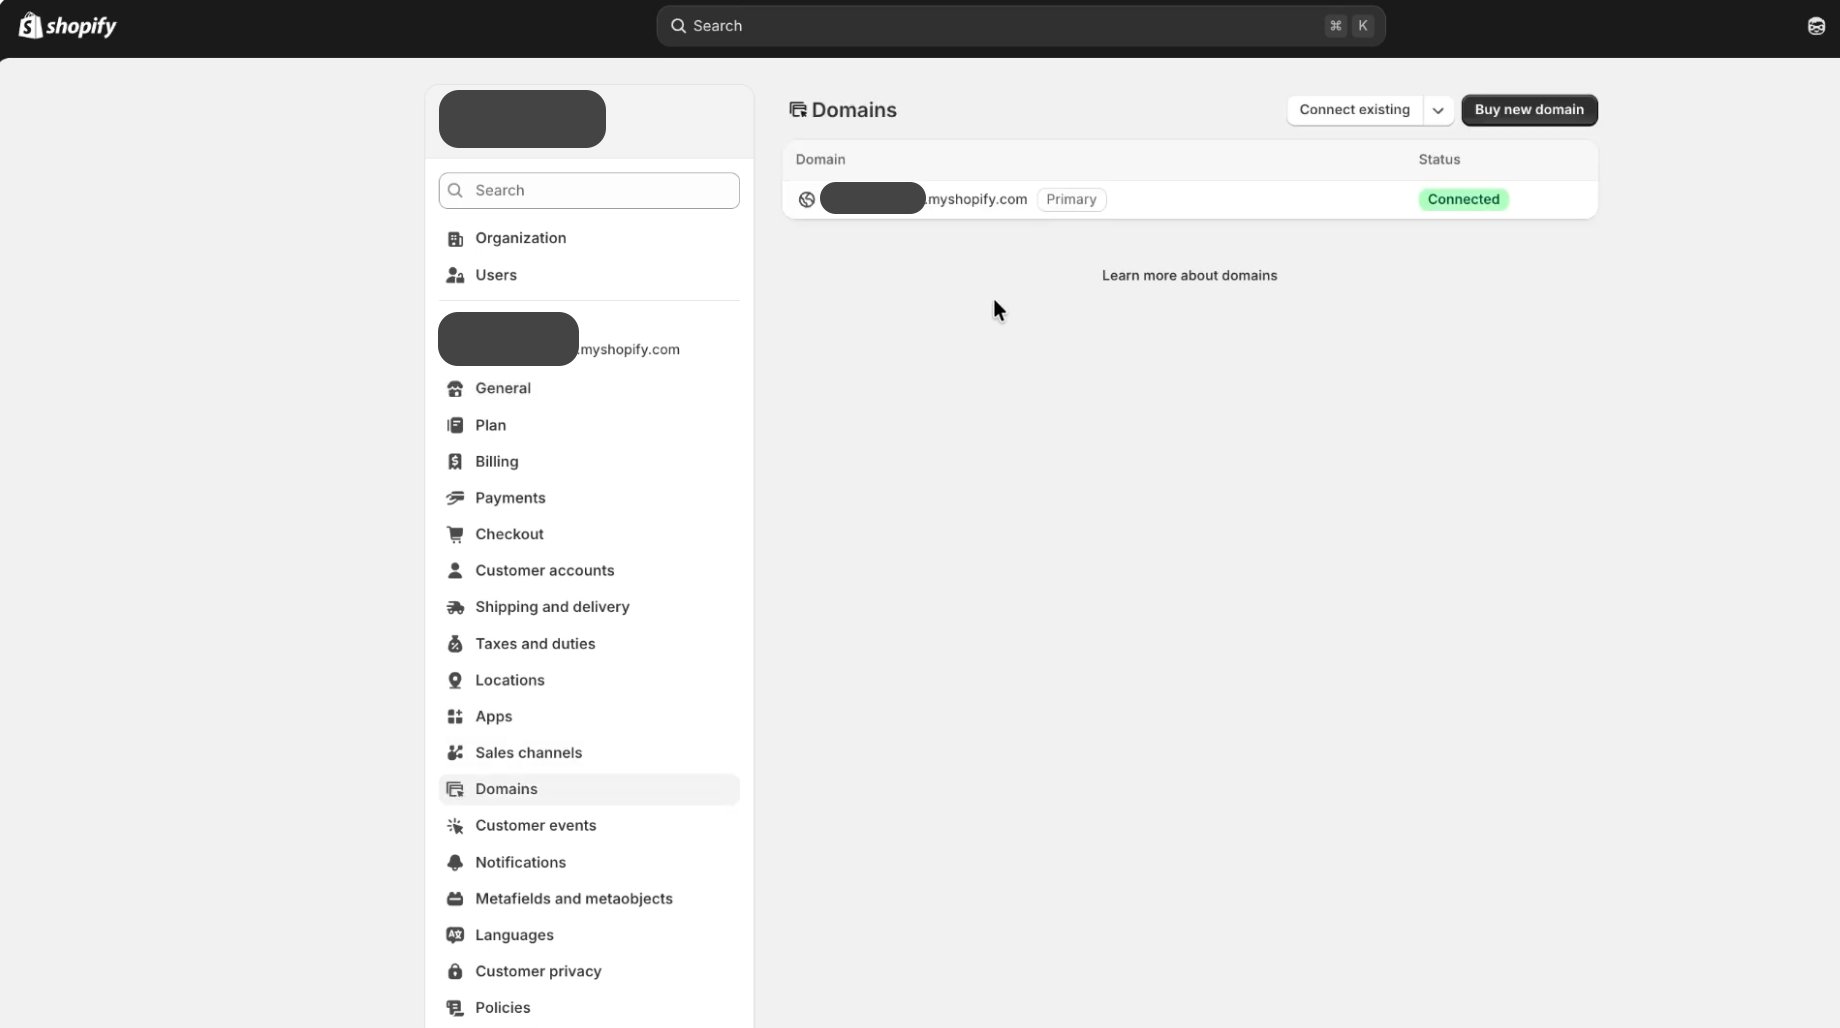
Important: Don’t enter your custom domain (for example,mystore.com). Hurry needs the originalmyshopify.comaddress to complete the integration correctly.
Logo URL
Enter the public URL of your store’s logo. You can use the magic wand button to have Hurry try to find your website’s logo automatically.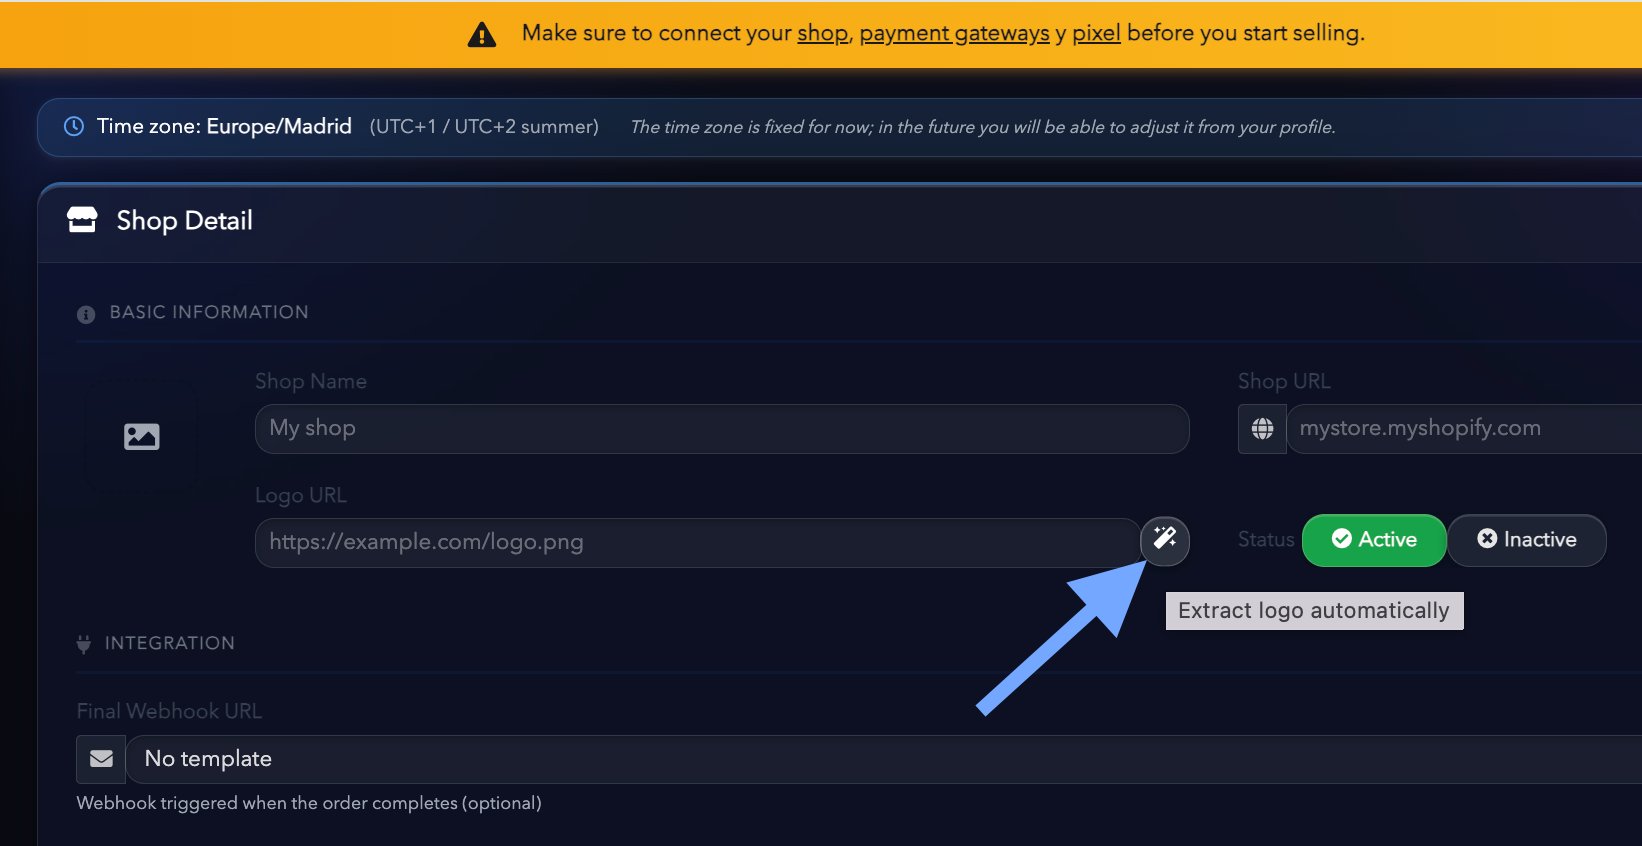
Create the store
Once you’ve filled in the fields above, click Create store. The store is added to your account immediately and you can access its settings.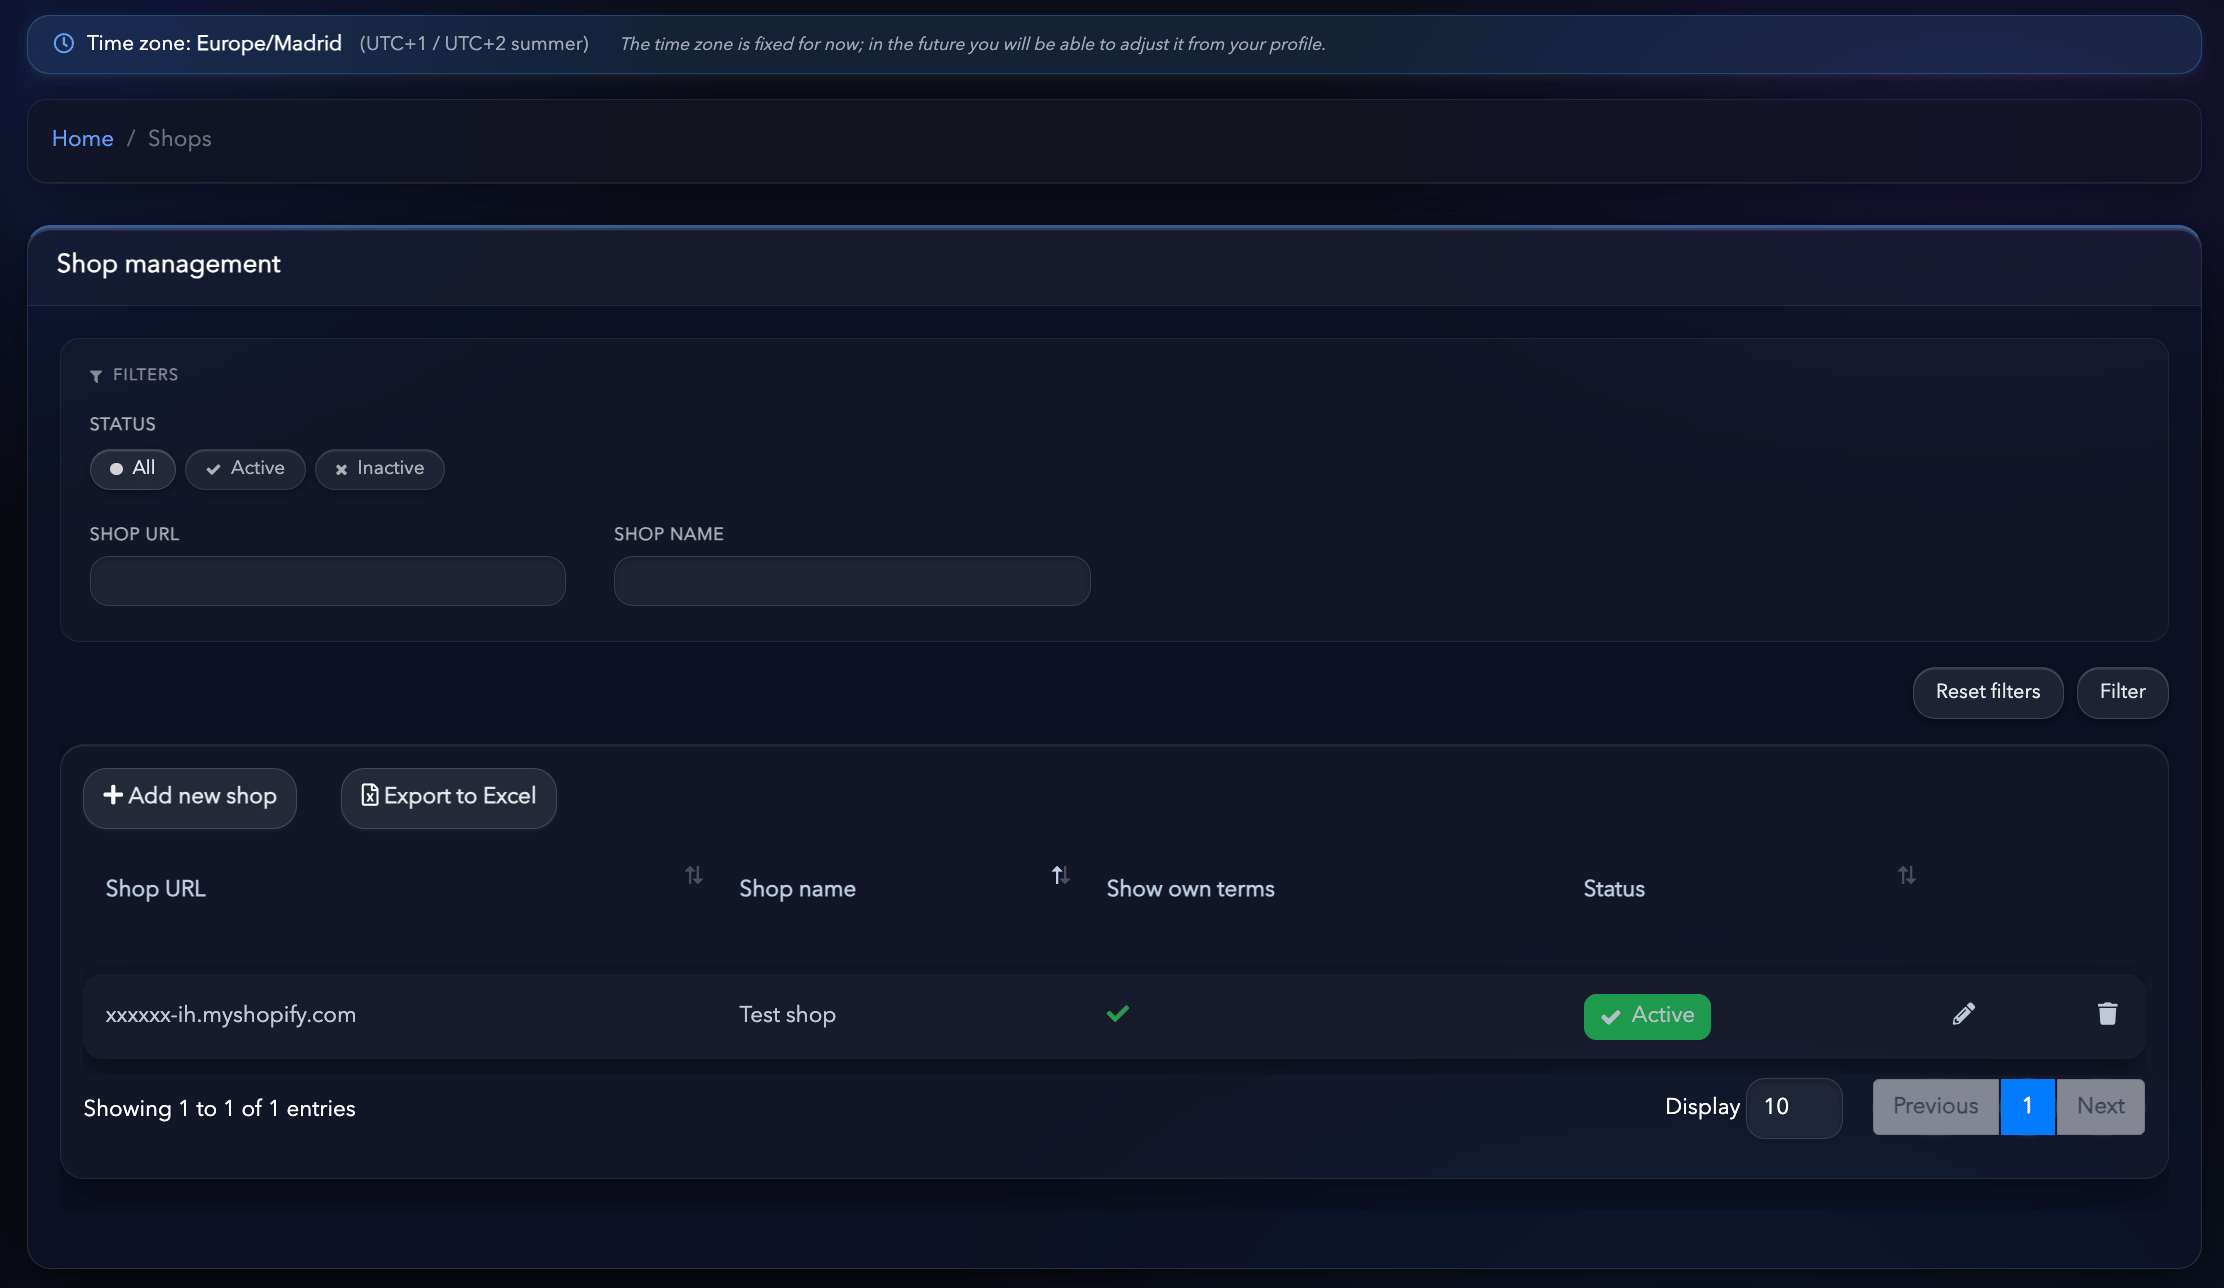
Customize the checkout
After creating the store, you can fully customize the checkout. You can change the design, colors, logo, copy, fields, layout and many other aspects to match your brand identity. This configuration is explained in detail in the Checkout customization section of the documentation.Install the Hurry script
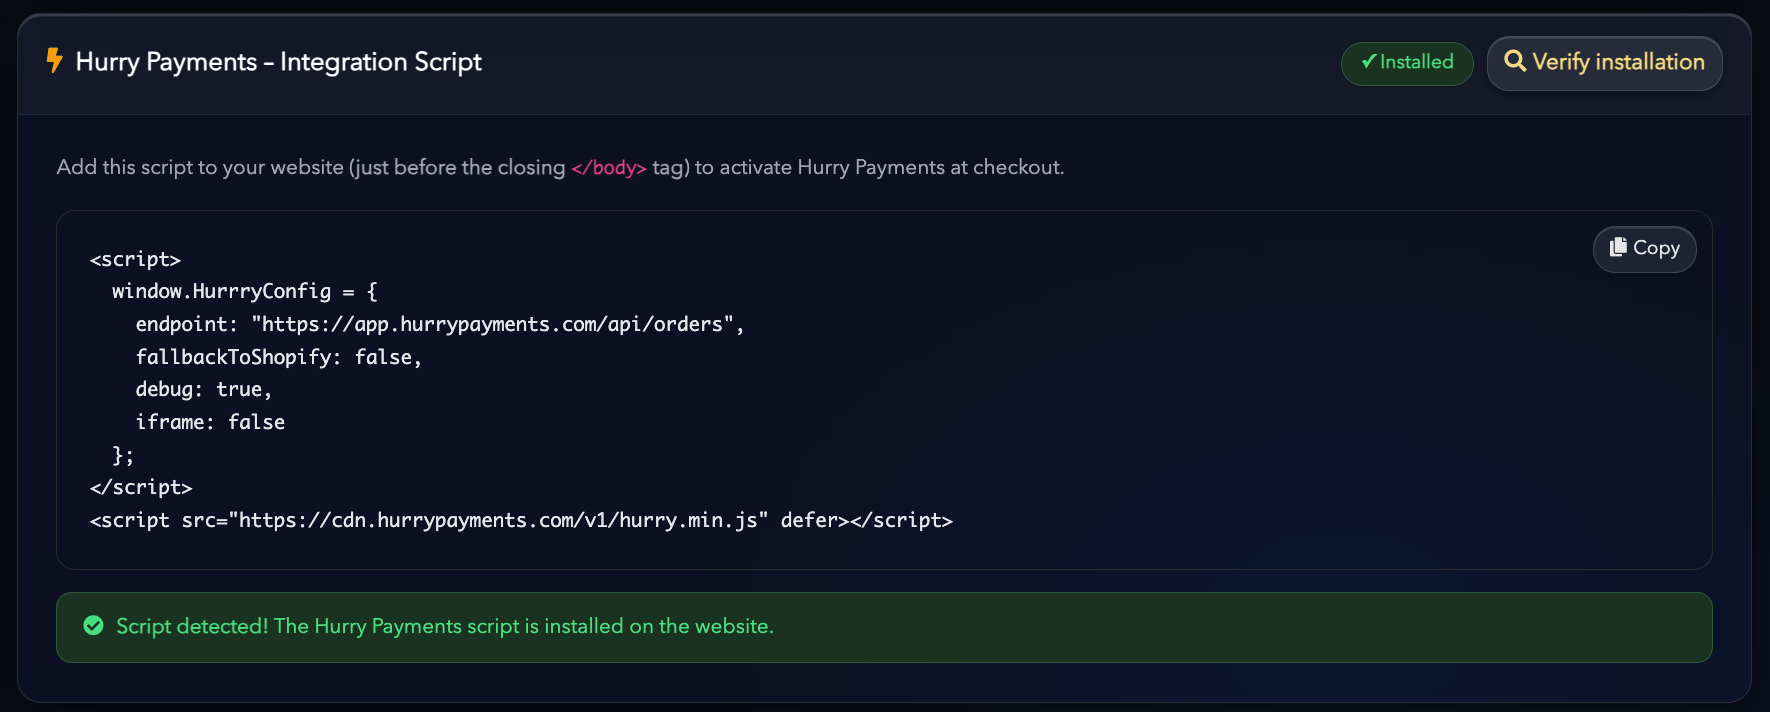
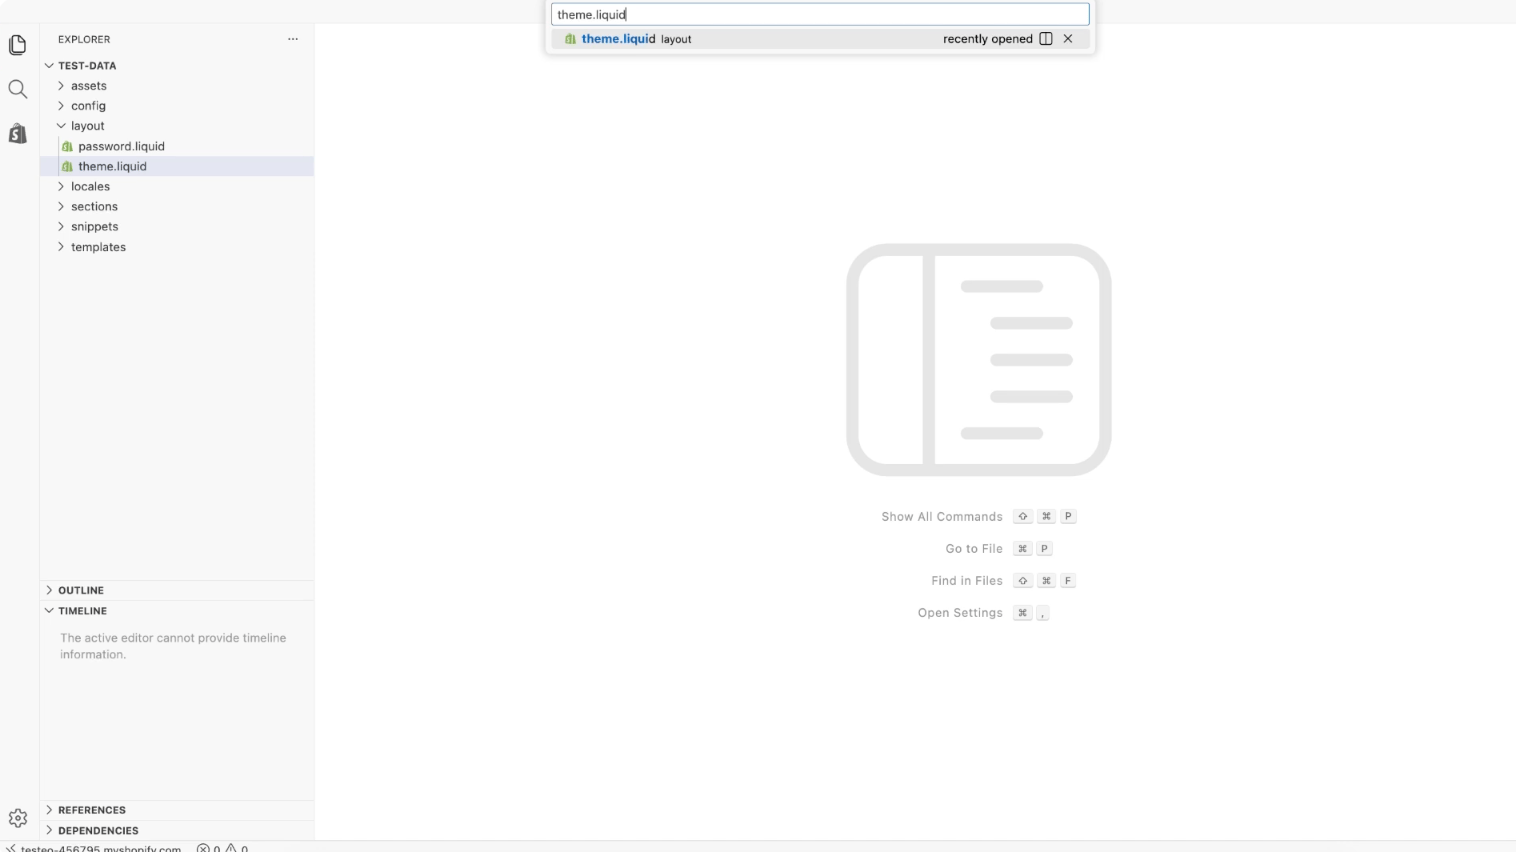
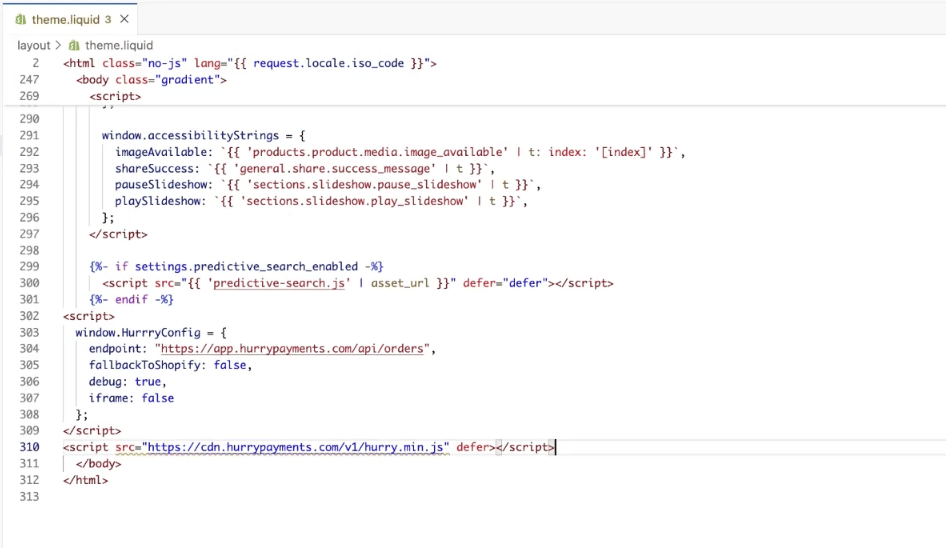
For Hurry to communicate correctly with your store, you need to install the integration script. At the bottom of the store settings page you’ll find a code snippet. Copy that code and add it to your Shopify theme’s theme.liquid file, right before the closing</body> tag.
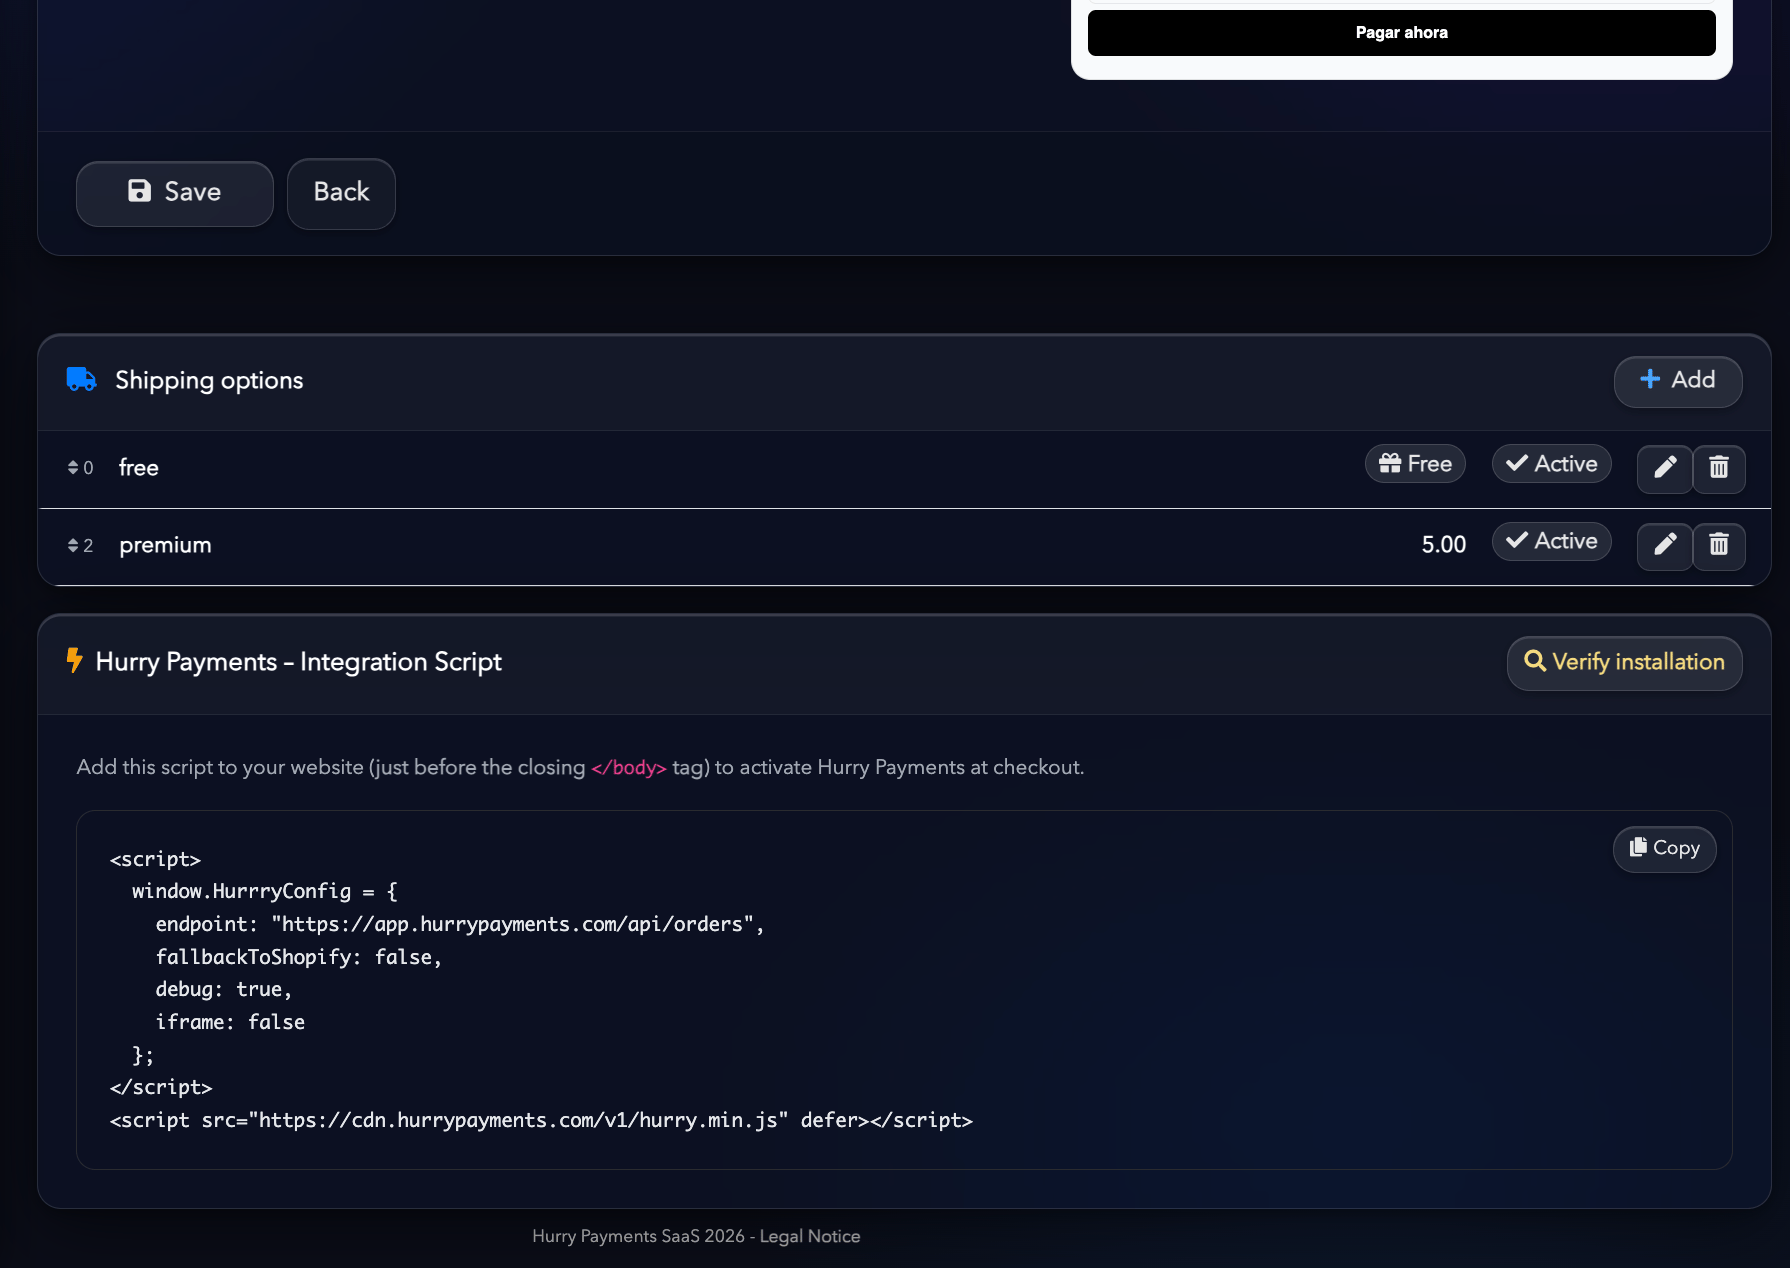
- Go to the “Online Store” section
- Edit the code of your current theme
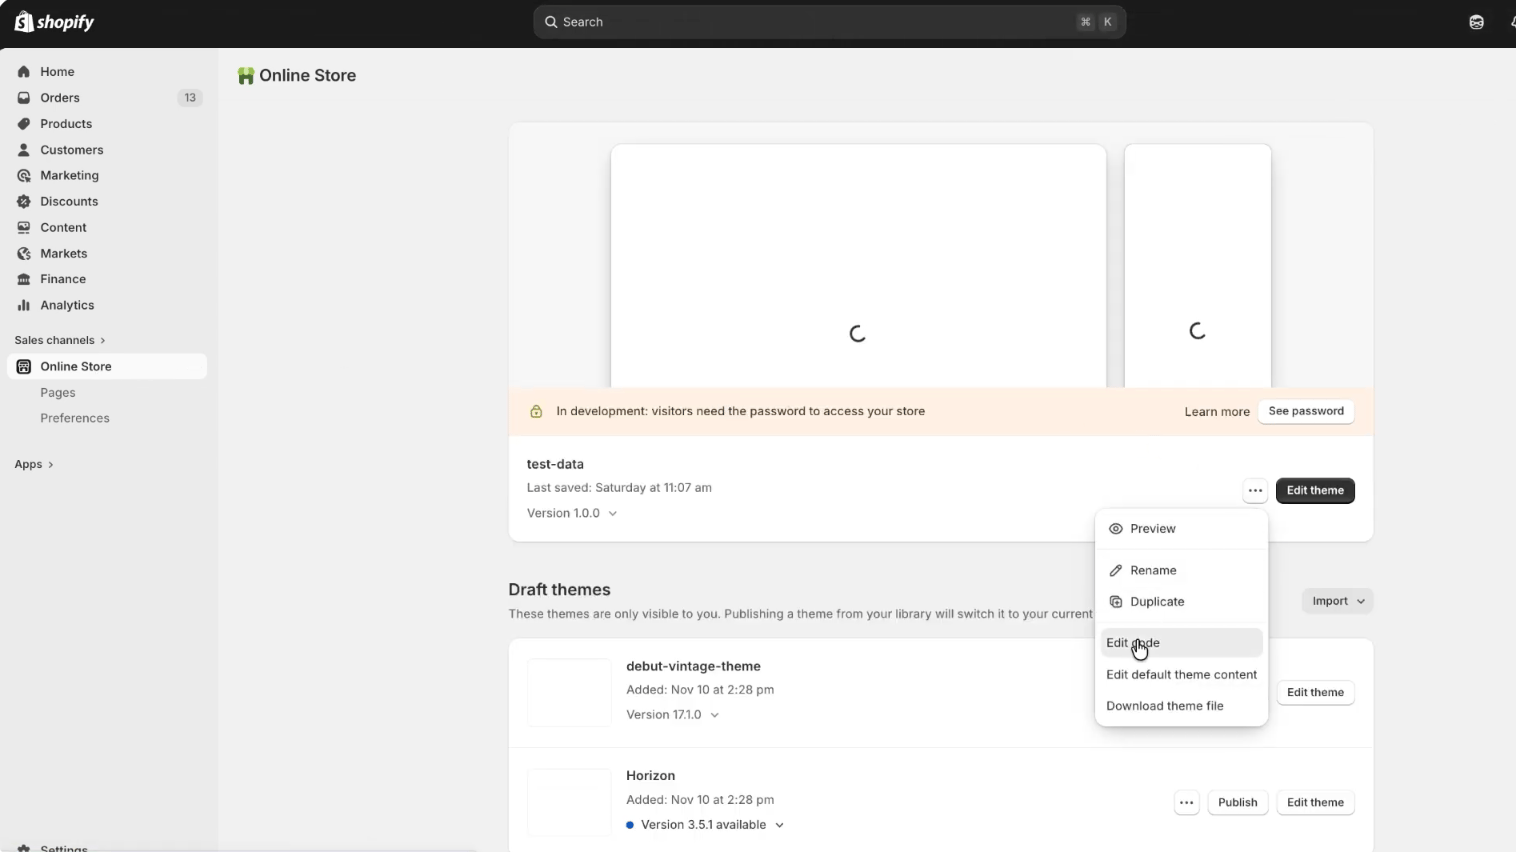
- Search for
theme.liquidin the search bar at the top
- Paste the Hurry script right after
</body>at the end of the file
- Check it with the
Verify installationbutton