
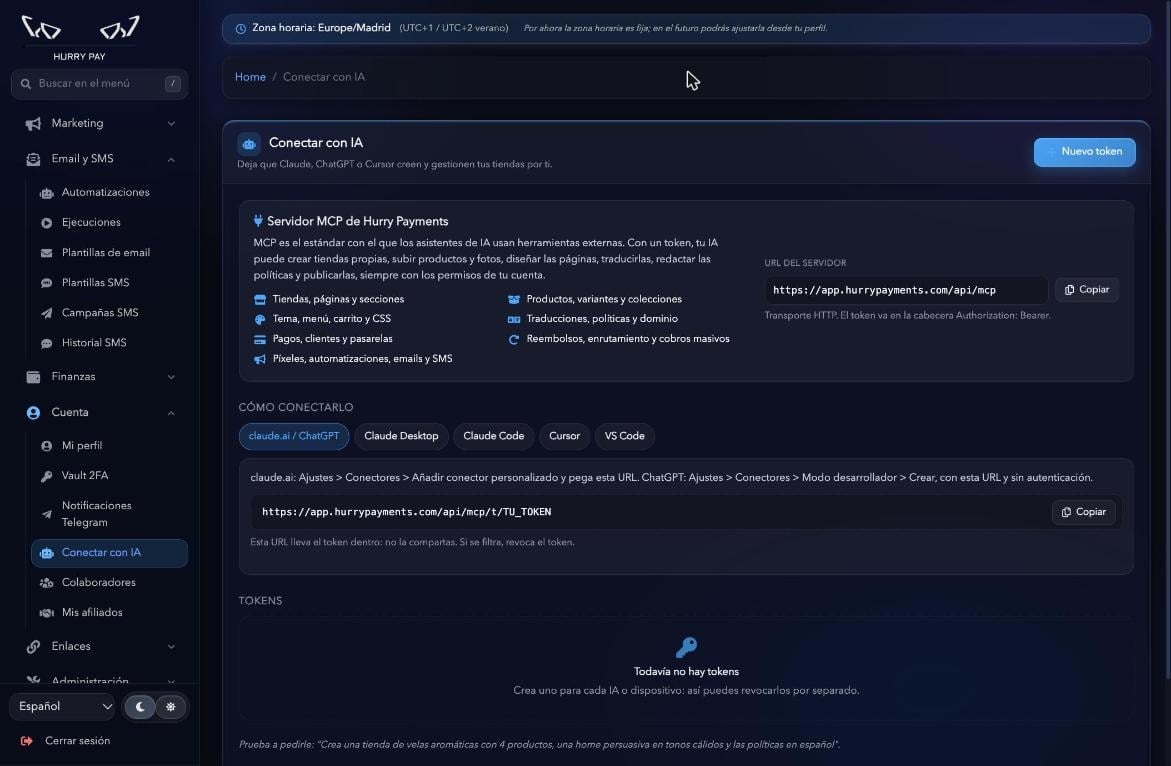
What the AI can do
With a connected token, the AI can work on these areas of your account: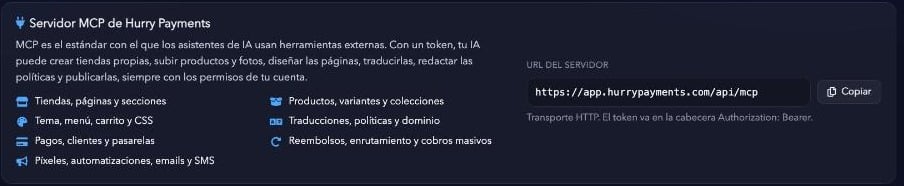
Step 1: create a token
The token is the key the AI uses to access your account. Create a different one for each AI or device so you can revoke them separately.1
Open the form
In Connect with AI, click New token (top right).
2
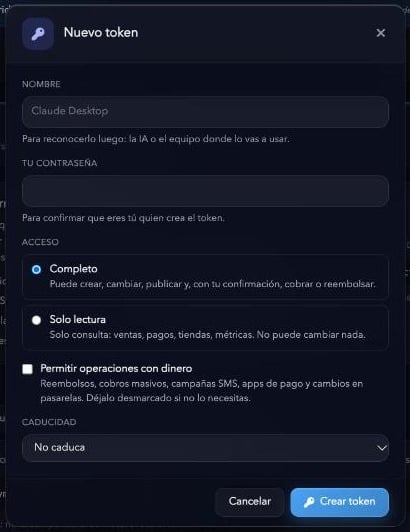
Give it a name
In Name, enter the AI or device you’ll use it with, for example
Claude Desktop or Cursor laptop. This helps you recognize it later.3
Confirm with your password
In Your password, enter your Hurry account password to confirm that you’re the one creating the token.
4
Choose the access level
- Full: can create, change, publish and, with your confirmation, charge or refund.
- Read only: can only view sales, payments, stores and metrics. It can’t change anything.
5
Decide whether to allow money operations
The Allow money operations checkbox enables refunds, bulk charges, SMS campaigns, paid apps and gateway changes. Leave it unchecked if you don’t need it.
6
Choose the expiration
In Expiration you can choose Never expires, 7 days, 30 days, 90 days or 1 year.
7
Create the token
Click Create token. The token appears in the Tokens list.
Step 2: connect your AI
All connections use the same server URL:Server URL
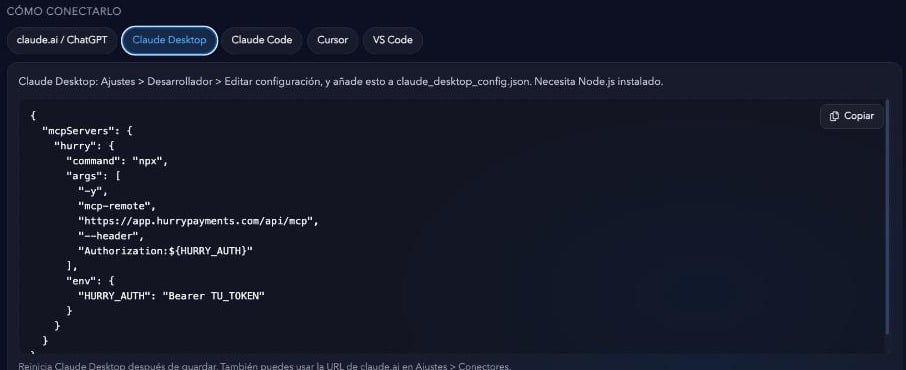
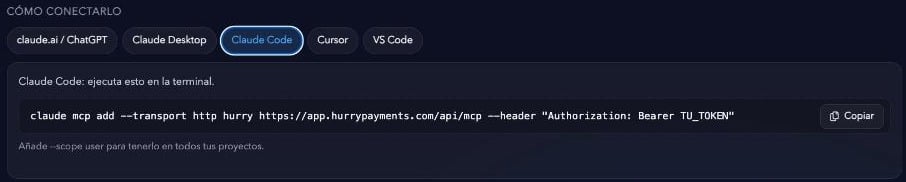
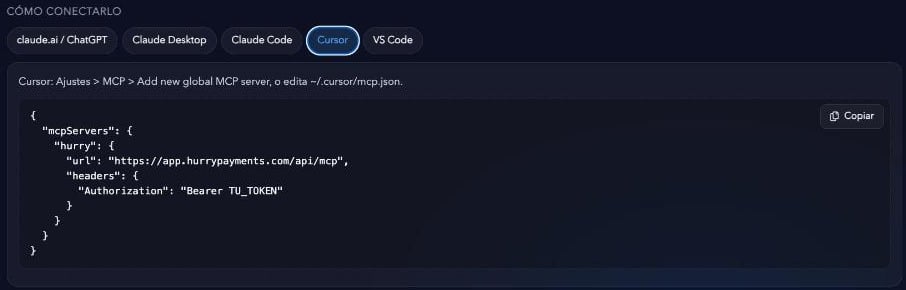
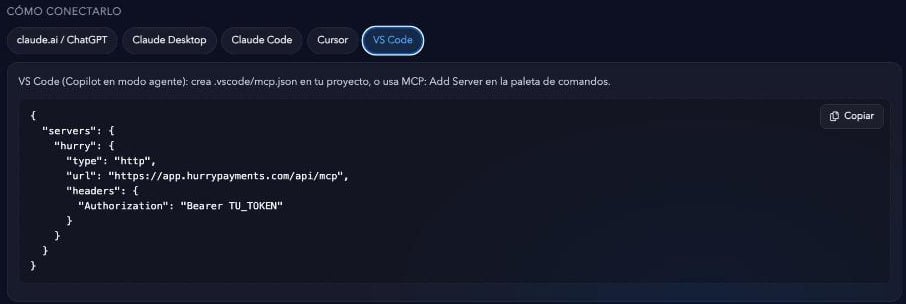
Authorization: Bearer header. In the examples, replace YOUR_TOKEN with the token you created.
In the How to connect it section there’s a tab for each tool, with a Copy button to grab the configuration.
- claude.ai / ChatGPT
- Claude Desktop
- Claude Code
- Cursor
- VS Code
For claude.ai and ChatGPT you use a URL that includes the token: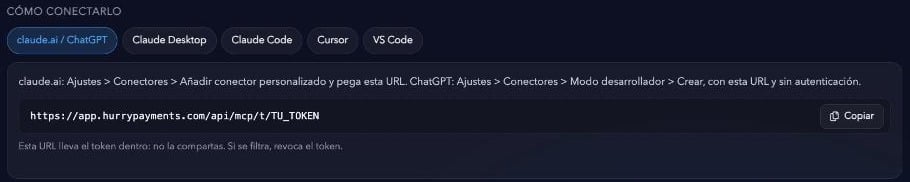
URL with token
- claude.ai: go to Settings > Connectors > Add custom connector and paste this URL.
- ChatGPT: go to Settings > Connectors > Developer mode > Create, paste this URL and leave the connection without authentication.
Step 3: ask your AI for something
Once connected, tell your AI what you need in plain language. For example:Create a scented candle store with 4 products, a persuasive home page in warm tones and the policies in English.The AI will use Hurry’s tools to do it, within the token’s permissions.
Manage your tokens
In the Tokens section you’ll see all the tokens you’ve created. Until you have one, the message No tokens yet is shown.
Security
- Treat the token like a password: don’t share it or publish it.
- Create one token per AI or device so you can revoke them separately.
- If a token or the URL with the token leaks, revoke it.
- Use Read only whenever the AI doesn’t need to make changes.
- Leave Allow money operations unchecked unless you need it.
- Consider setting an expiration on tokens you’ll only use for a limited time.